What you'll learn
- The simple-shapes method: every Christmas drawing starts with a circle, a triangle or a rectangle
- 15 easy Christmas drawing ideas, from the classics to sweet treats, with their steps
- 3 step-by-step picture tutorials: the Christmas tree, the snowman and Santa
- The Christmas color palette, and how to color white, gold and gingerbread
- 5 ways to use your drawings: cards, gift tags, ornaments, windows and wrapping paper
- Which drawings to pick depending on a child's age
Easy Christmas drawings are not about talent: they are about shapes. A Christmas tree is three triangles. A snowman is three circles. A candy cane is a thick letter J. Once you see the simple shapes hidden in each drawing, anything becomes possible, whether you are 6 or 60.
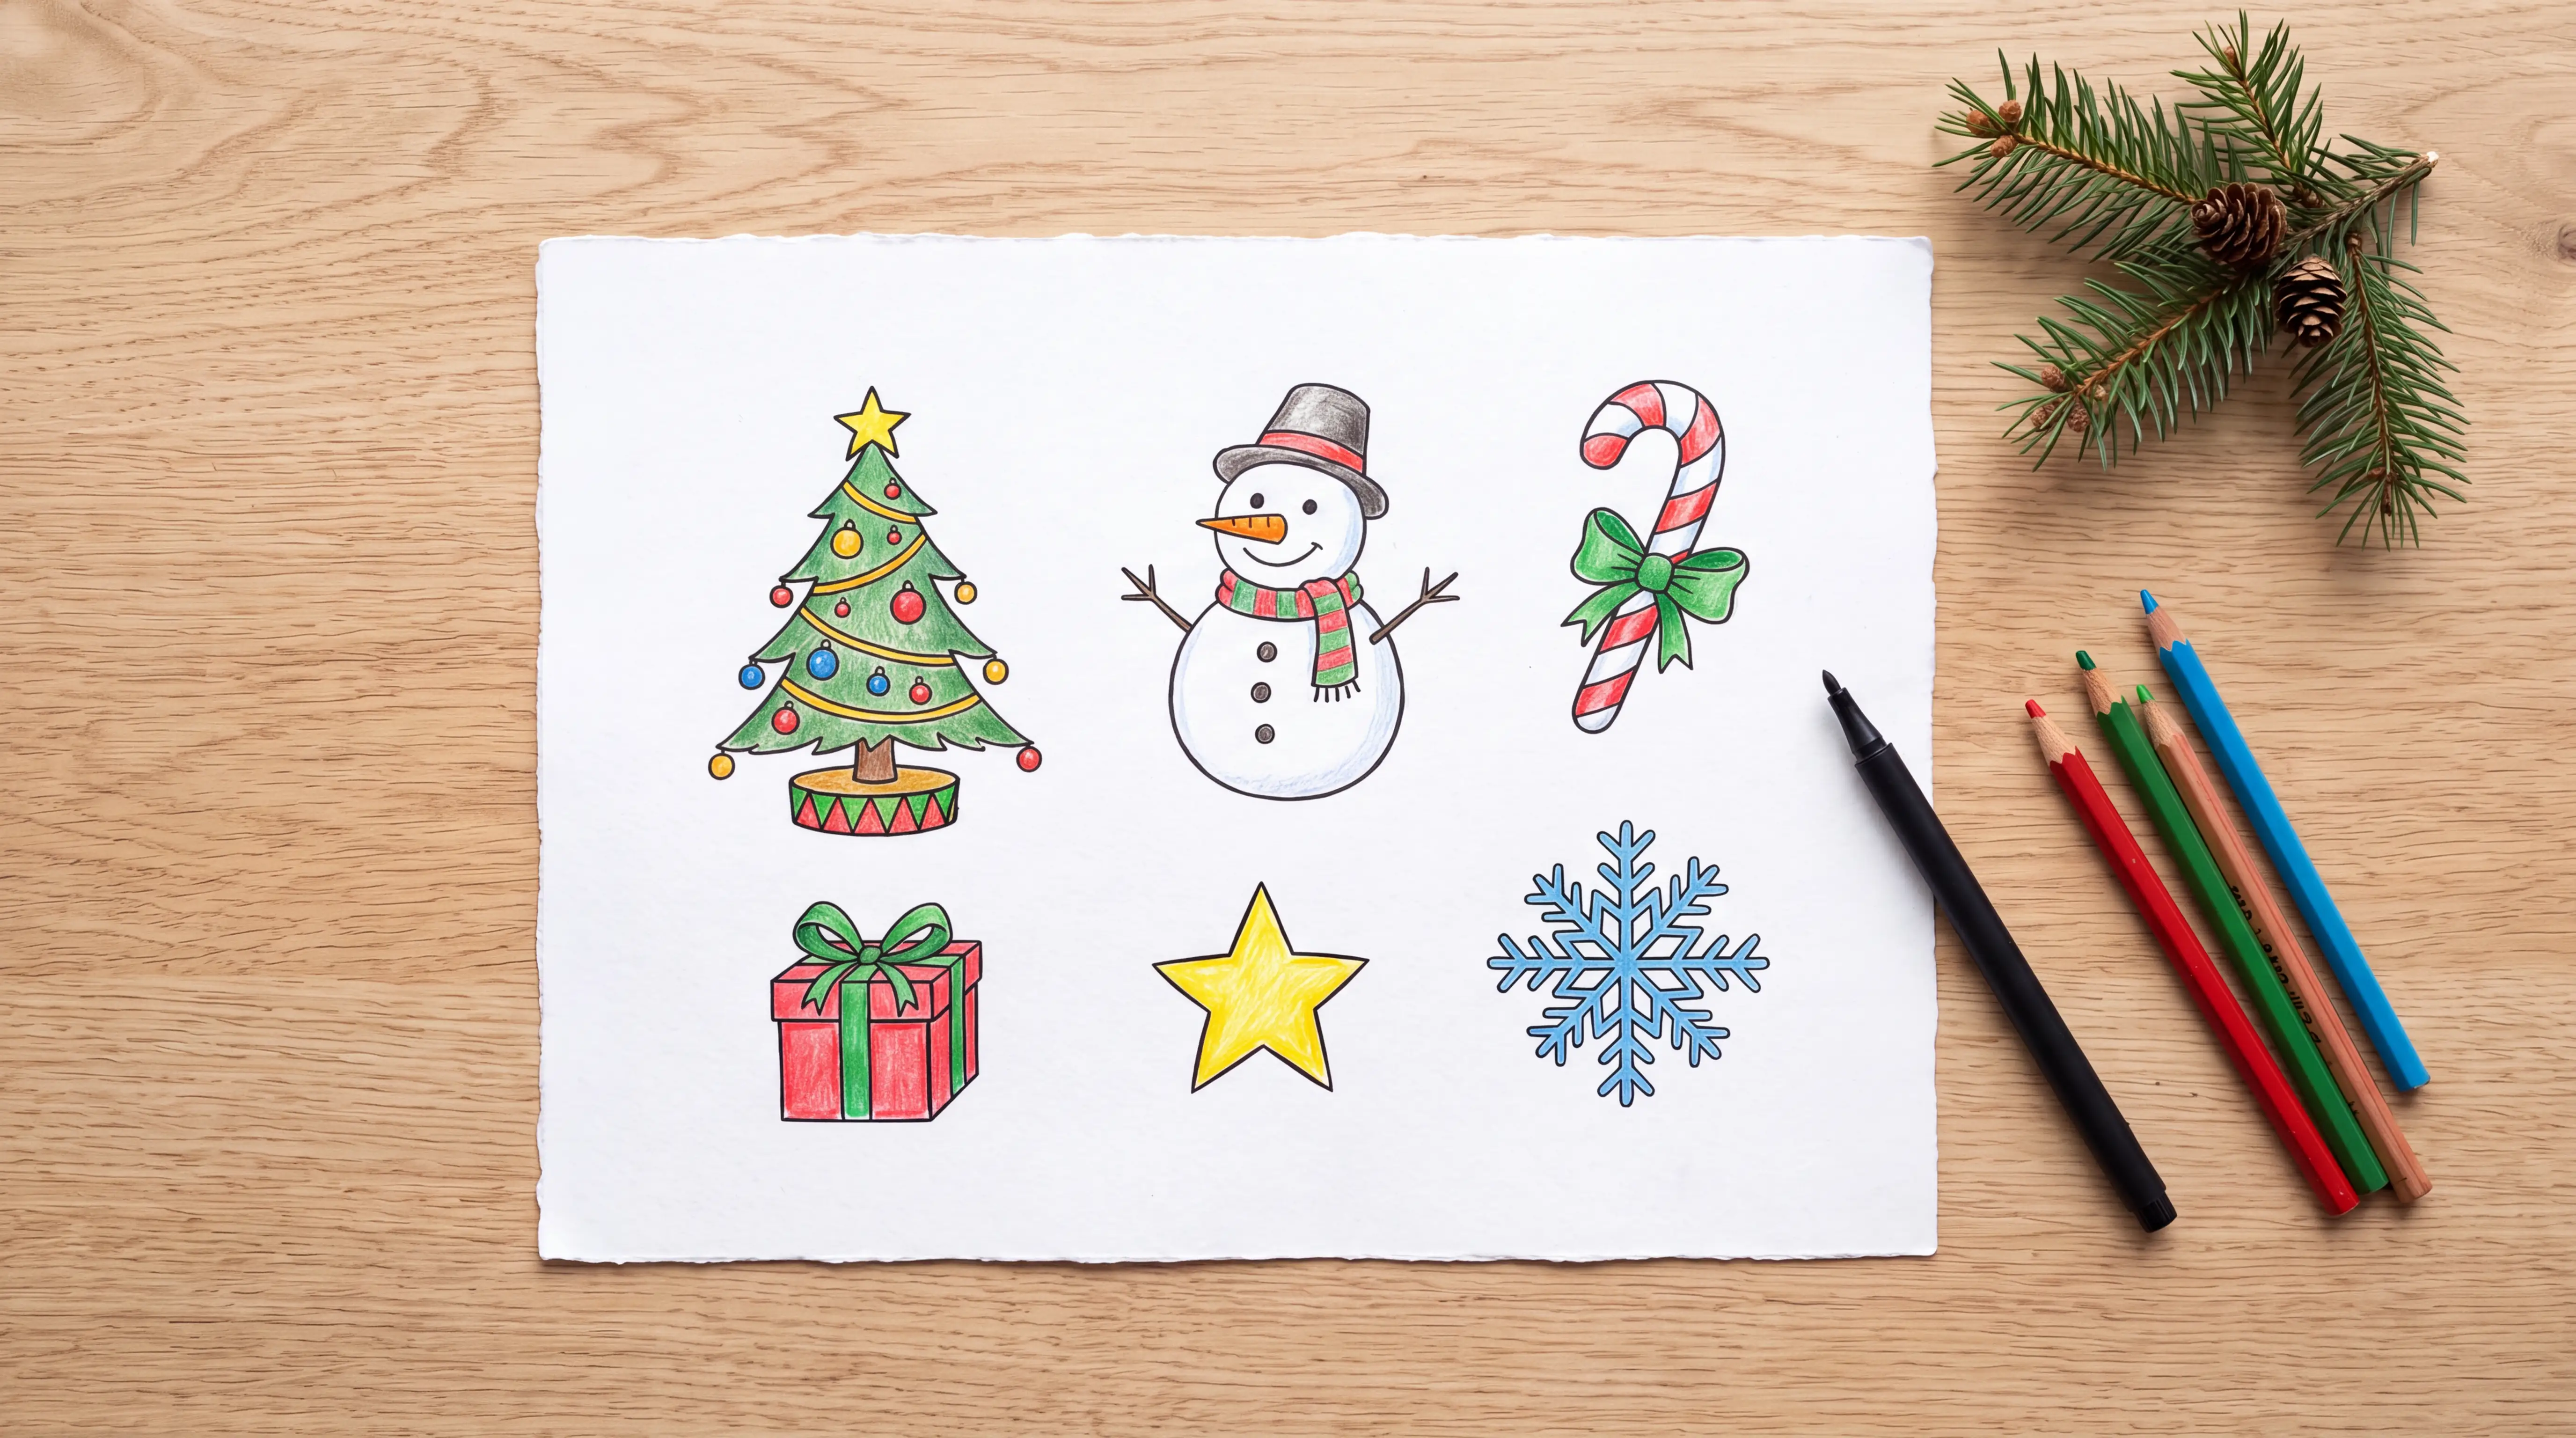
Here are 15 cute Christmas drawings to copy, from the great classics to sweet treats. For each one, you get a model, the steps to follow and a tip for coloring it. Three of them, the Christmas tree, the snowman and Santa, are also shown step by step in pictures. After that, you will find the Christmas color palette, five ways to use your drawings and the easiest ideas for kids.
Before you start: supplies and method
Supplies
No artist supplies needed. For every drawing in this article, you need:
- a pencil (HB) and an eraser, for the first sketch;
- a fine black felt-tip pen, to go over the outlines;
- colored pencils or markers for coloring;
- as a bonus, a white or gold gel pen for highlights, snowflakes and decorations.
Any plain white paper works. For a Christmas card, slightly thicker cardstock (65 to 110 lb) stands up better.
The simple-shapes method
All these simple Christmas drawings are built the same way, in four steps:
- The big shapes in pencil, with light strokes: circles, triangles, rectangles.
- The details: eyes, buttons, decorations, patterns.
- The outline in black pen, once the drawing looks right. Let it dry for a few seconds, then erase the pencil.
- The color, starting with the light areas.
Tip
Always draw the first step in pencil, very lightly. A wrong shape erases in two seconds; a pen line does not. That is what makes the difference between a hesitant drawing and a clean one.
Classic Christmas drawings
1. How to Draw a Christmas Tree
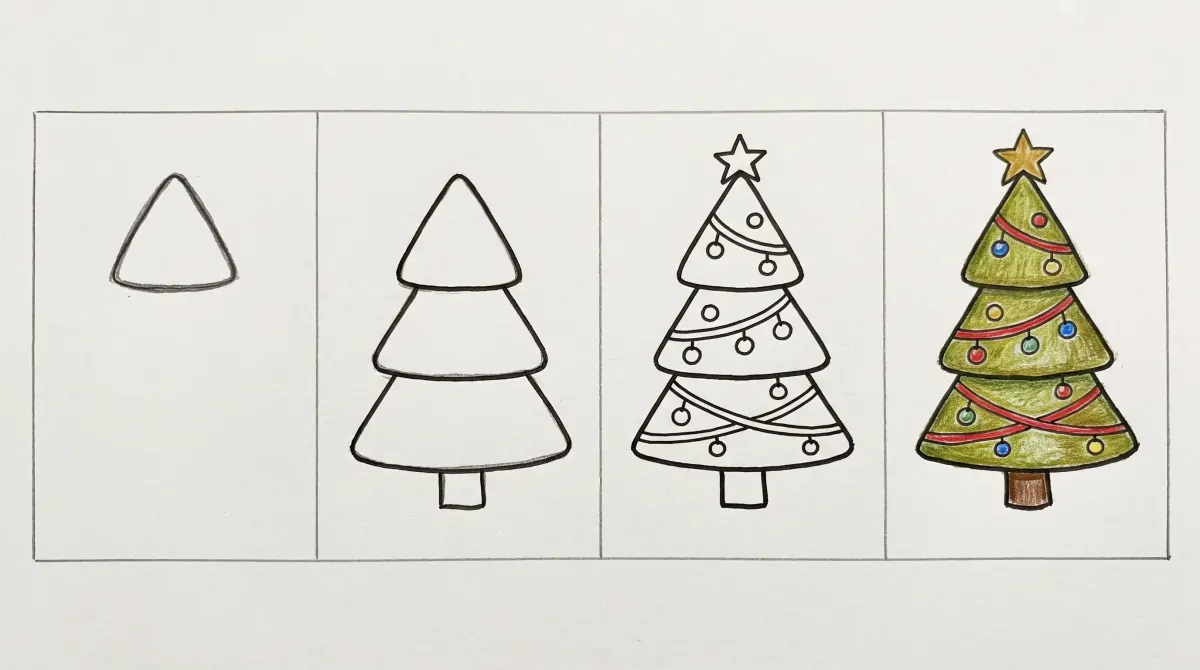
The Christmas tree is the most searched Christmas drawing, and one of the easiest: it only takes three triangles.
Level: very easy · Time: 10 minutes
- Draw a small triangle with rounded corners near the top of the page.
- Below it, draw two wider triangles that slightly overlap.
- Add a small rectangle for the trunk, or a pot.
- Put a star on top, a wavy garland from side to side and small circles for the ornaments.
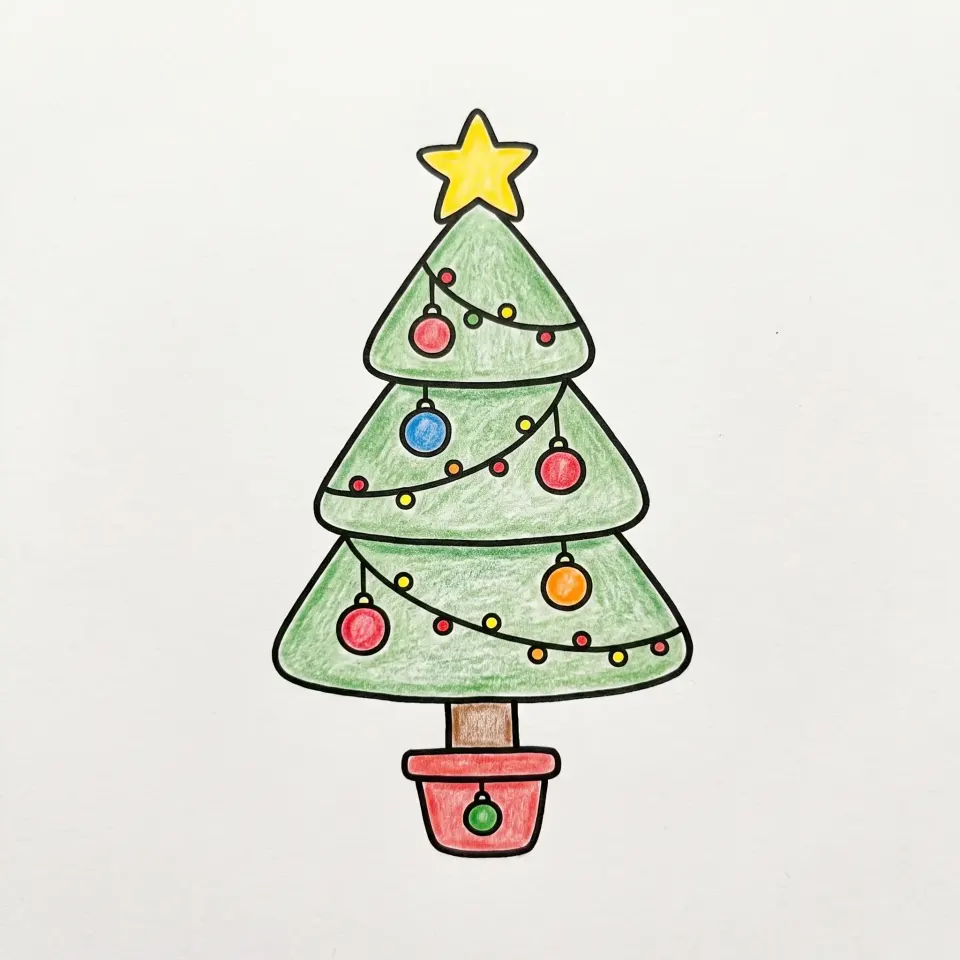
Coloring tip: use two greens, a light one on the whole tree and a dark one under each tier, where the branches cast a shadow. The bright ornaments will stand out even more.
2. How to Draw Santa Claus
Santa looks hard, but he comes down to a circle, a hat and a cloud-shaped beard.
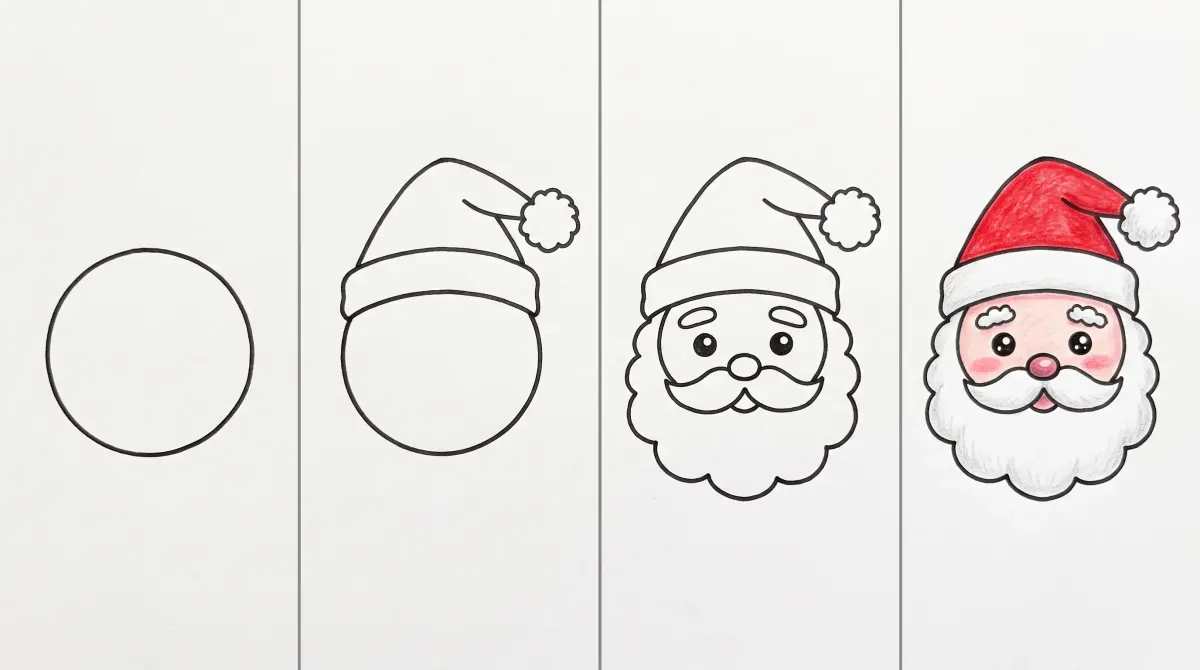
Level: easy · Time: 15 minutes
- Draw a circle for the face.
- Top it with a hat: a rounded band for the fur, a triangle that flops to one side and a pom-pom shaped like a small cloud.
- Draw the beard as a cloud outline around the bottom of the face, then the mustache (two small waves), a round nose and two dots for eyes.
- For the full body, add a trapezoid coat under the beard, a belt with a square buckle, two short legs with boots, and one arm raised to wave.
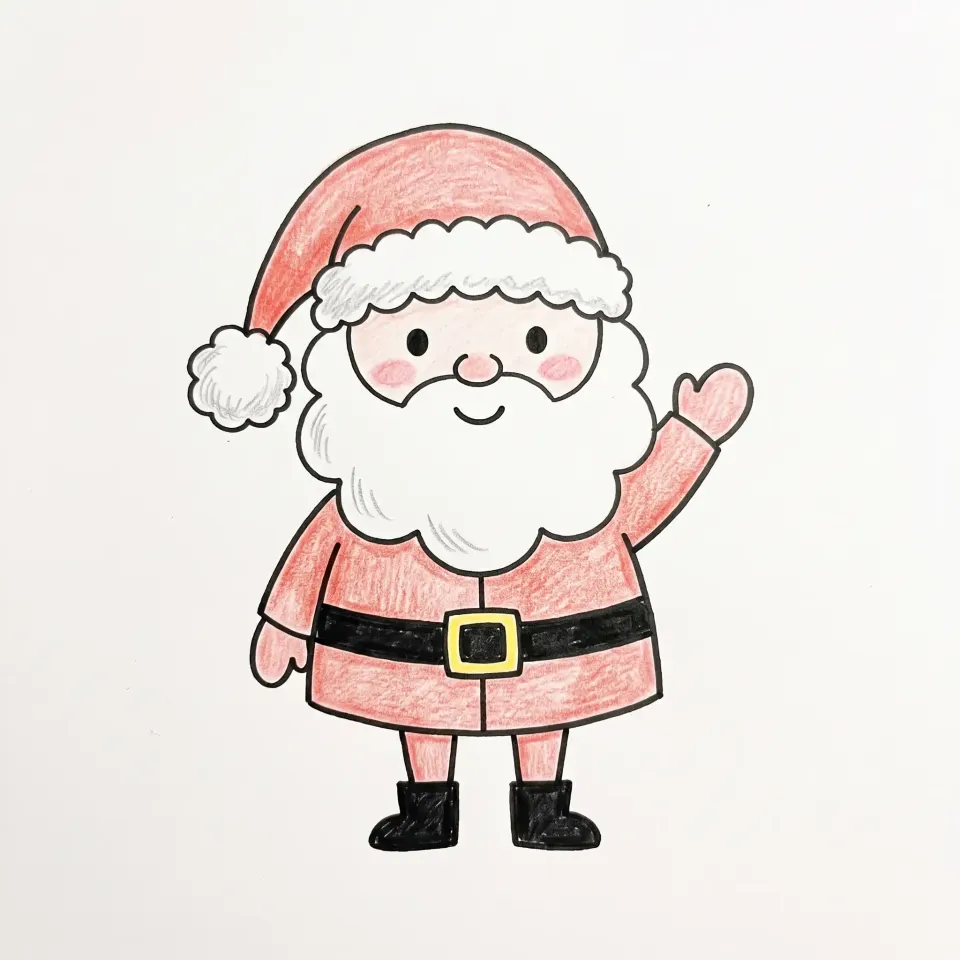
Coloring tip: keep the white of the paper for the beard and fur, and shade them very lightly in light gray. A touch of pink on the cheeks instantly gives Santa his jolly look.
3. How to Draw a Snowman
Three stacked circles and you are done. It is the perfect first drawing with kids.
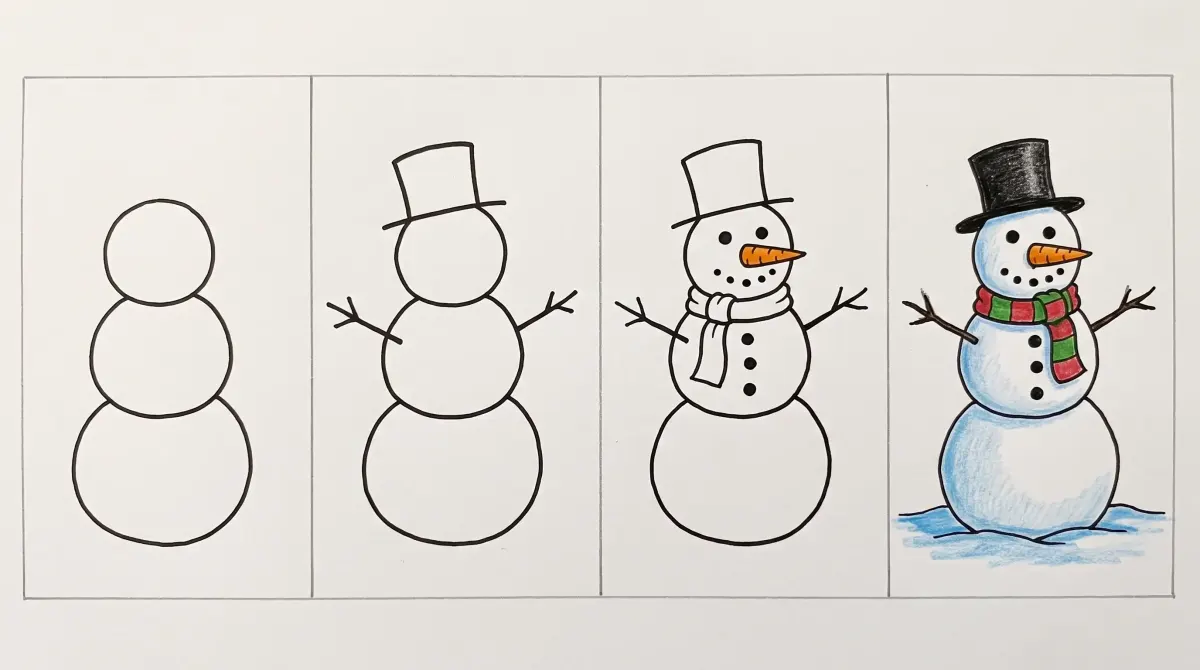
Level: very easy · Time: 10 minutes
- Stack three circles, from the largest at the bottom to the smallest on top.
- Add a top hat (a rectangle on a flat brim) and two twig arms with two or three small branches at the end.
- Draw the eyes and mouth as small dots, a carrot nose (a long triangle) and three buttons.
- Wrap a scarf around the neck: a band and a hanging end, with a few stripes.
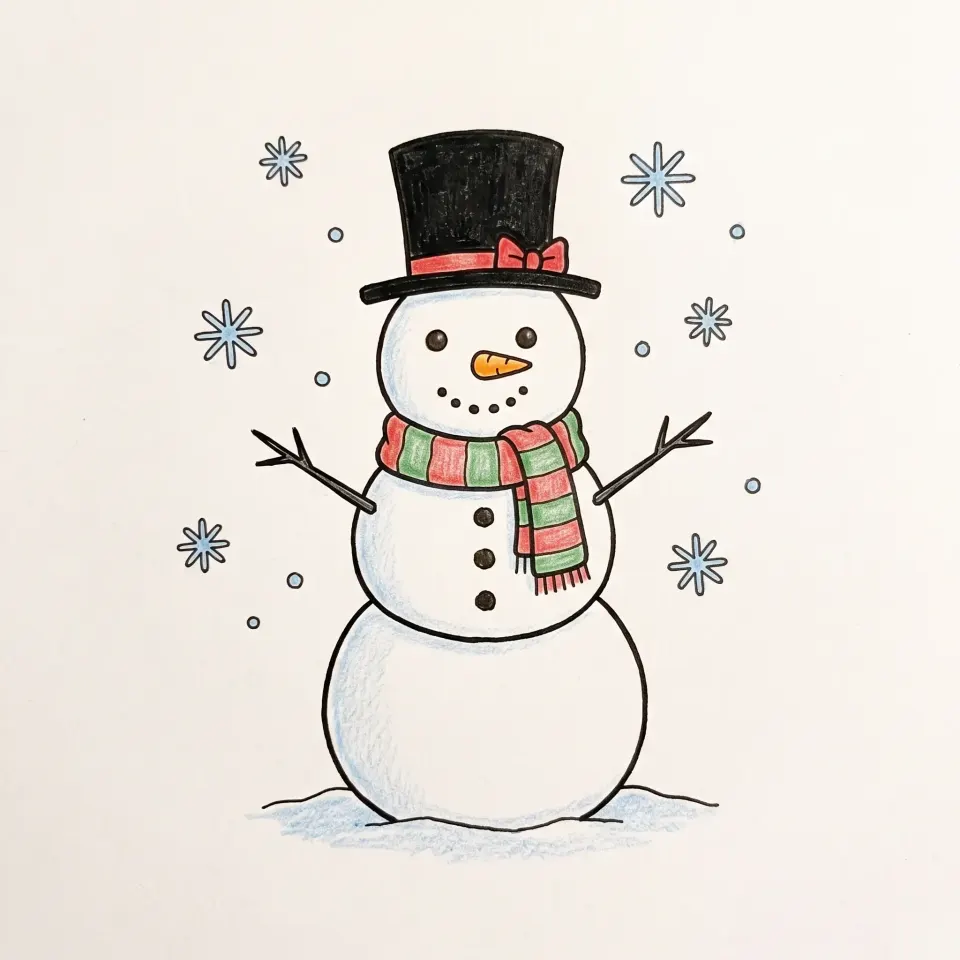
Coloring tip: do not color the snowman white: leave the paper and add only a light blue shadow on one side of each snowball. The snow will look whiter than white.
4. How to Draw a Reindeer
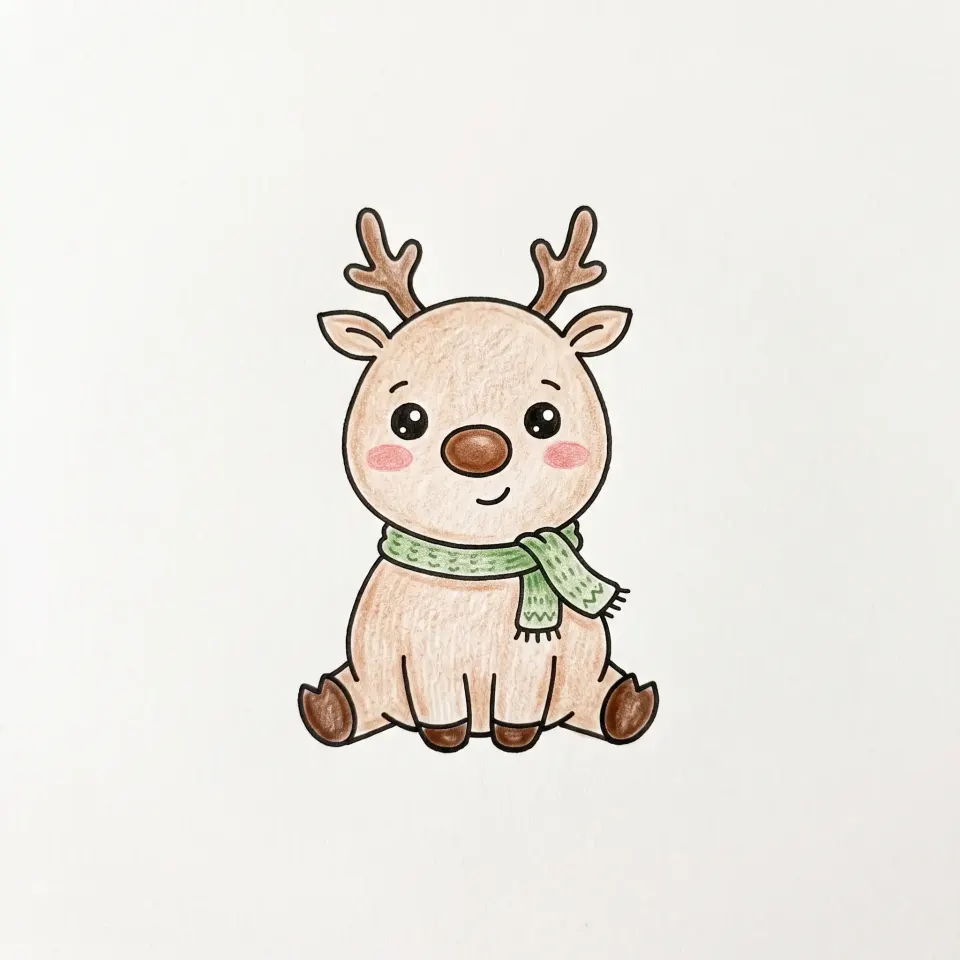
Cute reindeer are very popular, and much easier than realistic ones: everything is round.
Level: easy · Time: 15 minutes
- Draw an oval head, a little wider than tall, with a teardrop ear on each side.
- Add the antlers: a curved stem with two small branches on each side.
- Draw a big round nose, two eyes and a small smile.
- Under the head, draw a pear-shaped body sitting down, with two front legs, two rounded hooves and a scarf to finish.
Coloring tip: light brown for the body, a darker brown for the antlers and hooves. Keep the nose brown or chocolate: your reindeer gets a style all its own.
5. How to Draw a Christmas Elf
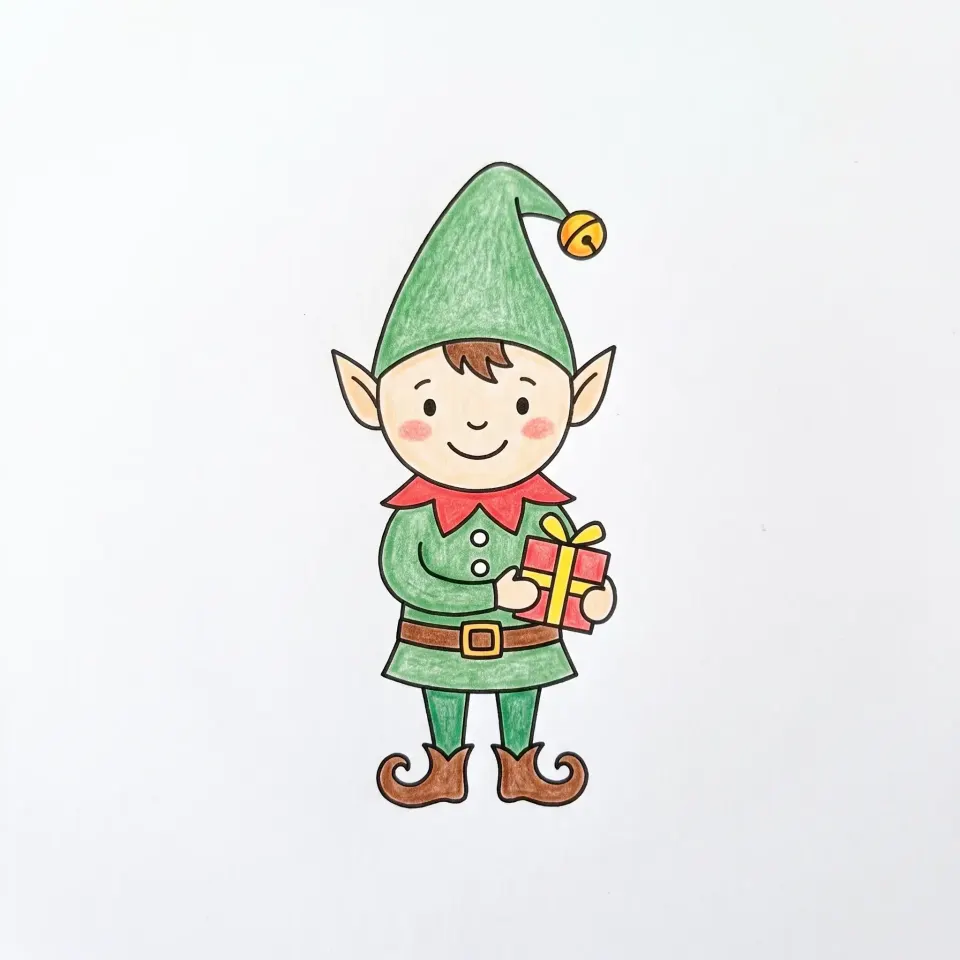
The elf is a very simple character, built like a little person: a round head, a pointy hat and a rectangle body.
Level: easy · Time: 15 minutes
- Draw a round head with two pointed ears (two small triangles).
- Add a triangle hat that curls at the tip, with a round bell.
- Draw the body: a trapezoid tunic, a zigzag collar and a belt.
- Add thin legs, curly pointed shoes, and a small gift in its hands.
Coloring tip: two greens (a light one for the tunic, a dark one for the hat), red for the collar and a golden yellow for the bell and belt buckle.
Snow and winter animals
6. How to Draw a Snowflake
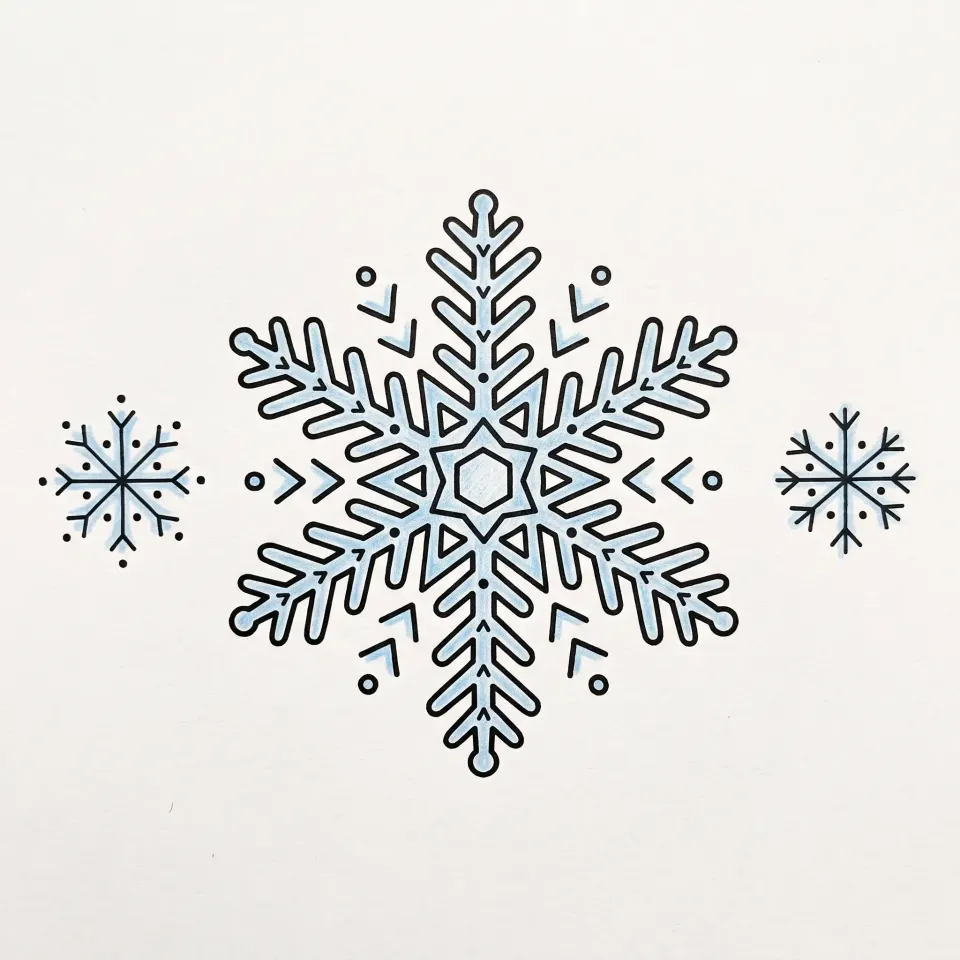
The snowflake is one of the most searched winter drawings. The secret: a star with six branches, never five.
Level: medium (it takes a bit of patience) · Time: 15 minutes
- Draw a vertical line, then two diagonal lines crossing at the same point: you get six branches of equal length.
- On each branch, add two small V shapes pointing outward.
- In the center, draw a small hexagon, or just a dot.
- Finish each branch with a small circle or a point.
Coloring tip: a very light blue on the whole snowflake, then a deeper blue along the outlines. On colored paper, a white gel pen makes beautiful snowflakes.
7. How to Draw a Penguin
Penguins are a winter favorite, and this one only takes two ovals.
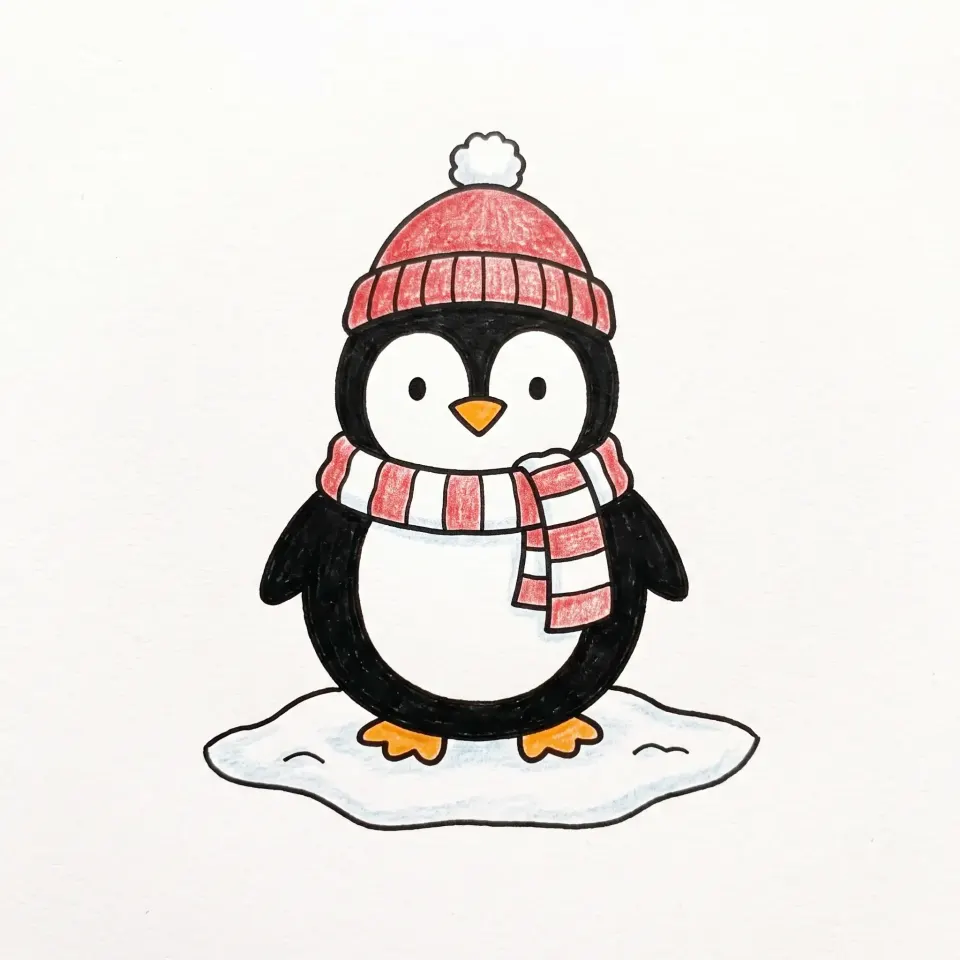
Level: very easy · Time: 10 minutes
- Draw a big oval for the body and, inside it, a smaller oval for the white belly, reaching up to the face.
- Add two teardrop-shaped wings on the sides.
- Draw two eyes, a triangle beak and two fan-shaped feet.
- Dress it in a beanie (a half circle and a pom-pom) and a scarf.
Coloring tip: color the back black or navy blue and leave the belly white. The orange beak and feet and the red hat make the drawing pop.
8. How to Draw a Polar Bear
A polar bear sitting with a mug in its paws: the ultimate winter drawing.
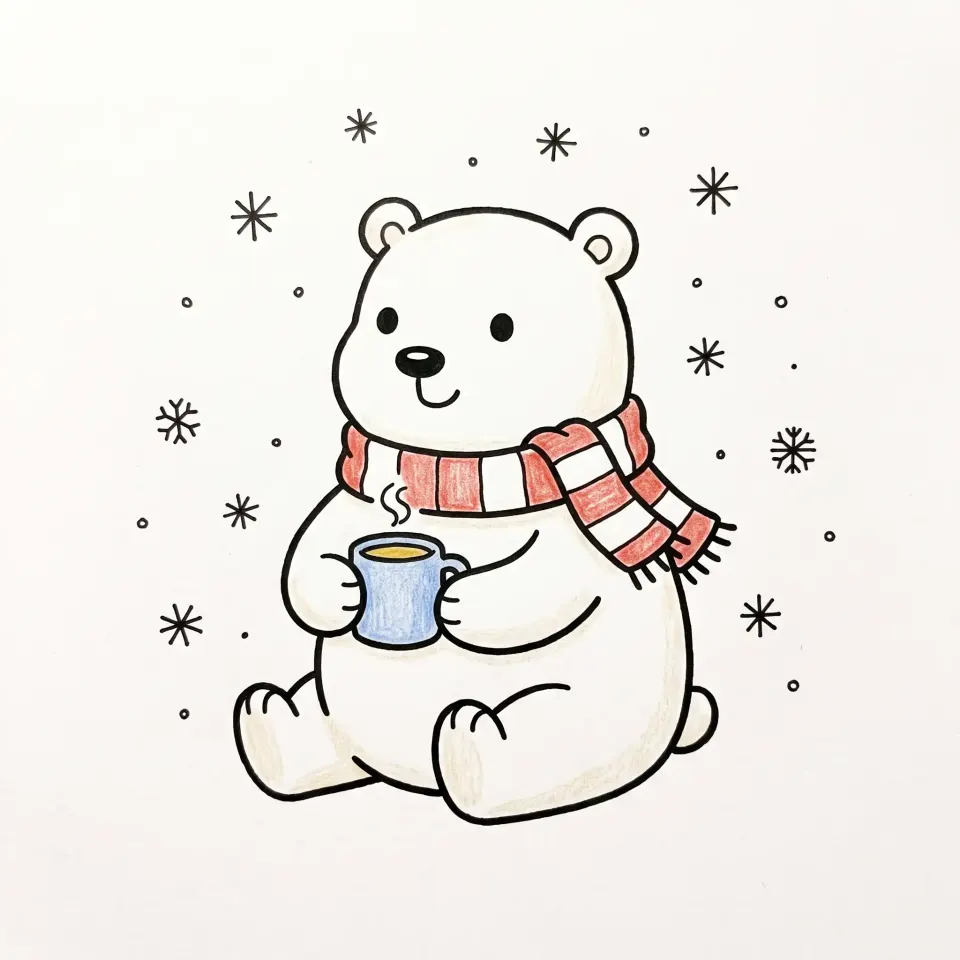
Level: easy · Time: 15 minutes
- Draw a round head with two small round ears.
- Add an oval muzzle, a black nose, two eyes and a smile.
- Draw a pear-shaped body sitting down, with two rounded hind legs in front.
- Place a mug between its front paws, and a scarf around its neck.
Coloring tip: just like the snowman, leave the paper white and shade the outline with a creamy yellow or a very light gray.
Christmas decorations
9. How to Draw Christmas Ornaments
The easiest Christmas drawing of all: a circle and a small rectangle. All the fun is in the patterns.
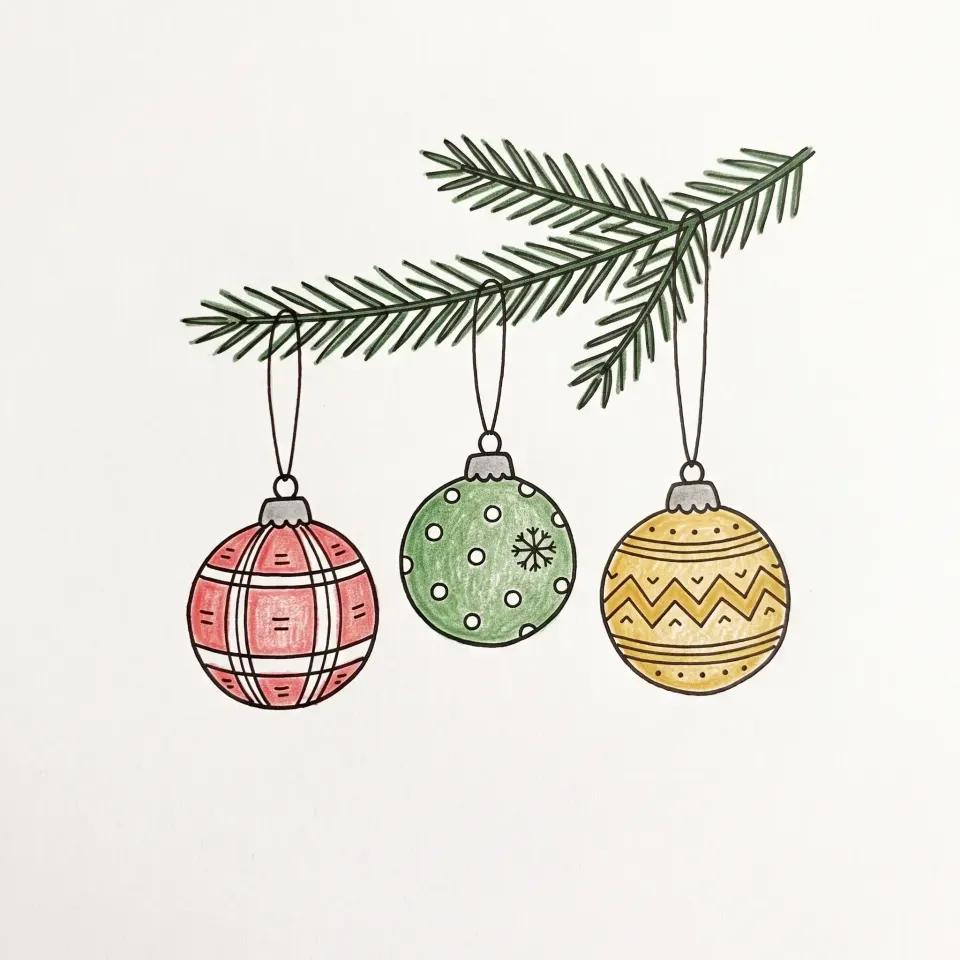
Level: very easy · Time: 5 to 10 minutes
- Draw a pine branch at the top: a stem with thin needles on each side.
- Draw three circles hanging from strings of different lengths.
- Top each ornament with a small rectangle for the cap.
- Decorate each one with a different pattern: stripes, dots, zigzags, plaid or a small snowflake.
Coloring tip: one color per ornament (red, green, gold), and a white highlight at the top left of each: leave a small uncolored spot to make it look shiny.
10. How to Draw a Christmas Wreath
The wreath takes a little more patience, but no more skill: a ring of leaves and a big bow.
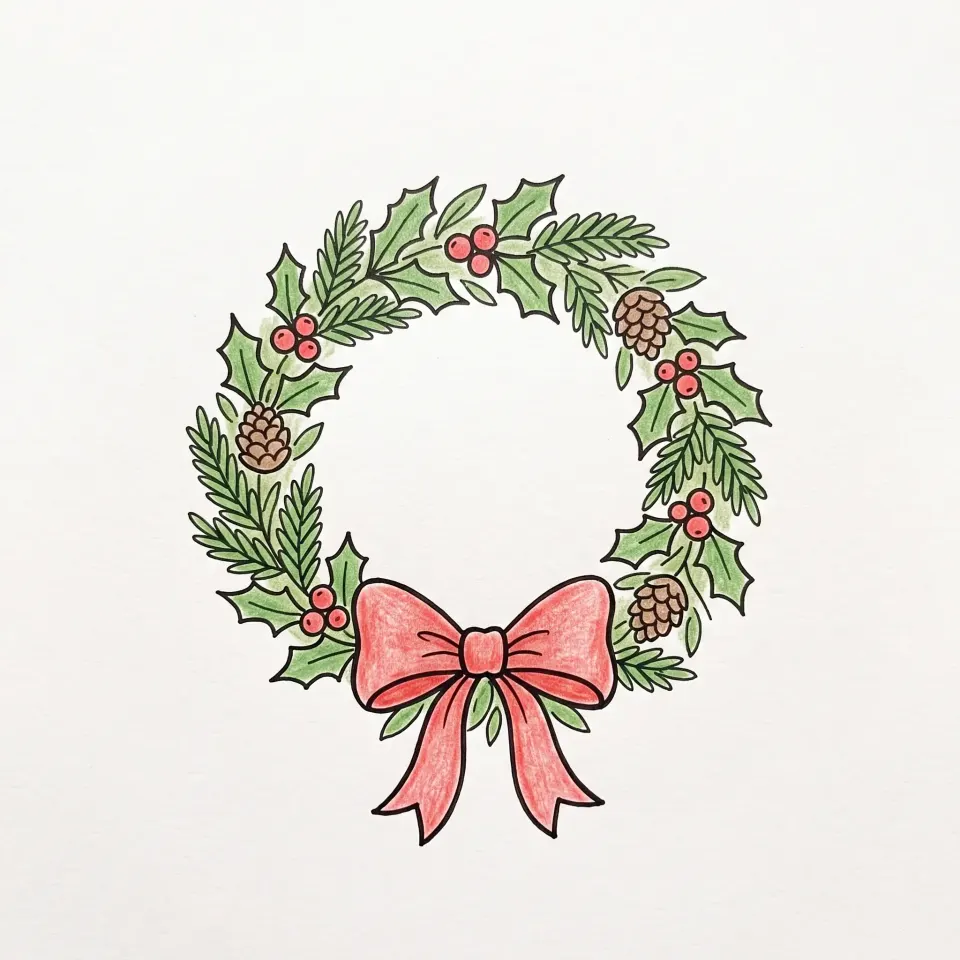
Level: medium · Time: 20 minutes
- Draw two circles, one inside the other, very lightly in pencil: this is the guide for the wreath.
- Fill the ring with leaves: pointy holly leaves and small pine sprigs, all going the same way.
- Add red berries in groups of three and a few pine cones.
- Draw a big bow at the bottom: two loops, a small square in the center and two hanging ribbons. Erase the guide circles.
Coloring tip: alternate two greens to give the leaves some depth. Use the same red for the bow and the berries so everything looks consistent.
11. How to Draw a Santa Hat
Santa’s hat on its own makes a great first drawing: a triangle that flops to the side.
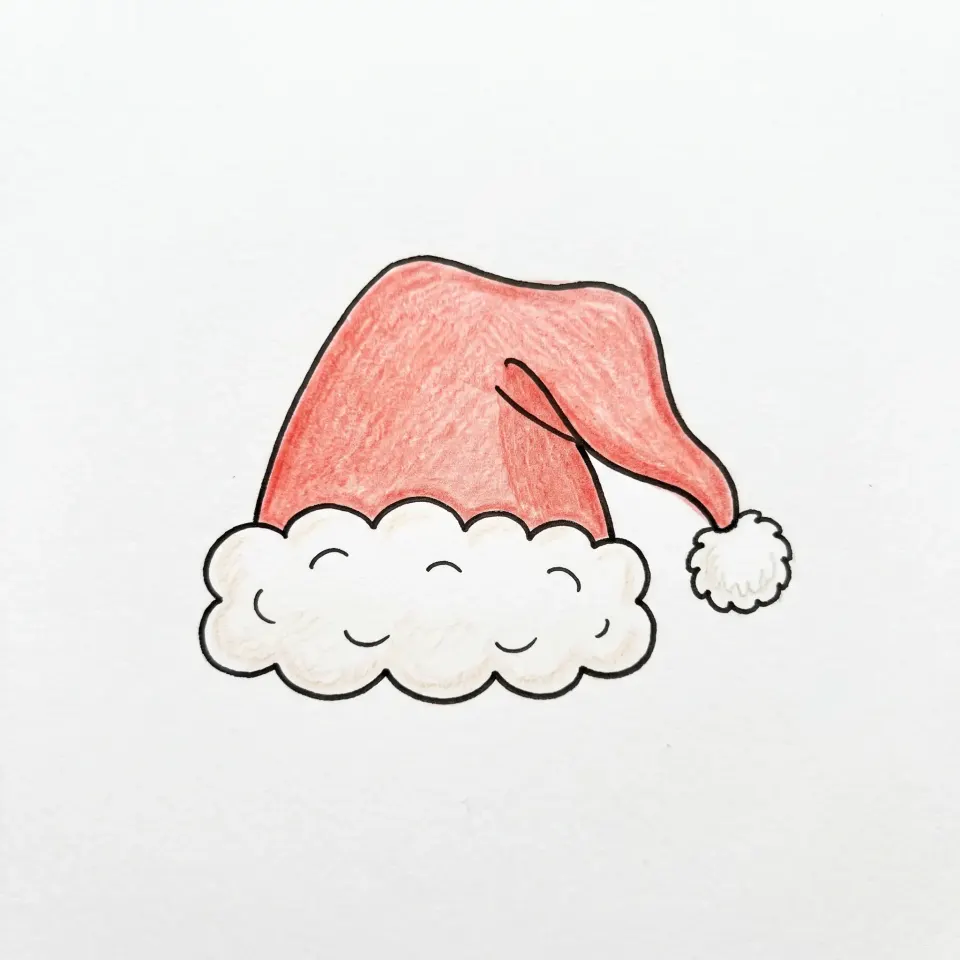
Level: very easy · Time: 5 minutes
- Draw a rounded band for the fur brim, with a wavy outline.
- Above it, draw a triangle whose tip flops to one side.
- Add a pom-pom at the end, shaped like a small cloud.
- Mark a fold where the hat bends.
Coloring tip: a bright red for the hat, darker in the fold. The hat also works on other drawings: put it on a cat, a penguin or a bear.
Sweet treats and gifts
12. How to Draw a Gingerbread Man
The gingerbread man is a one-line silhouette: perfect for beginners.
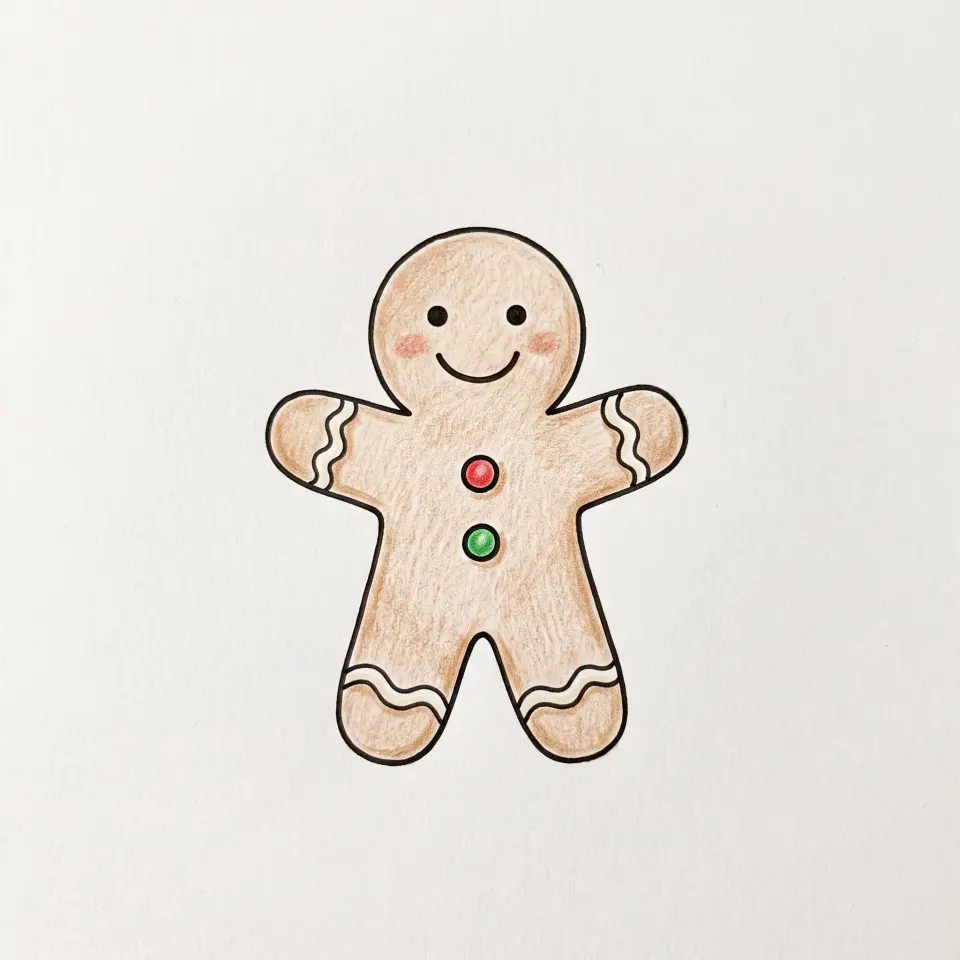
Level: very easy · Time: 10 minutes
- Draw a round head.
- Draw the body in one line: two rounded arms and two rounded legs, like a cookie cutter shape.
- Add the eyes, a smile and two or three round buttons.
- Draw the icing: a small wavy line at the end of each arm and leg.
Coloring tip: for a cookie color, layer ochre and light brown lightly. Leave the icing white and make the buttons red and green.
13. How to Draw Candy Canes
A candy cane is the letter J. Two crossed candy canes and a bow make a lovely card decoration.
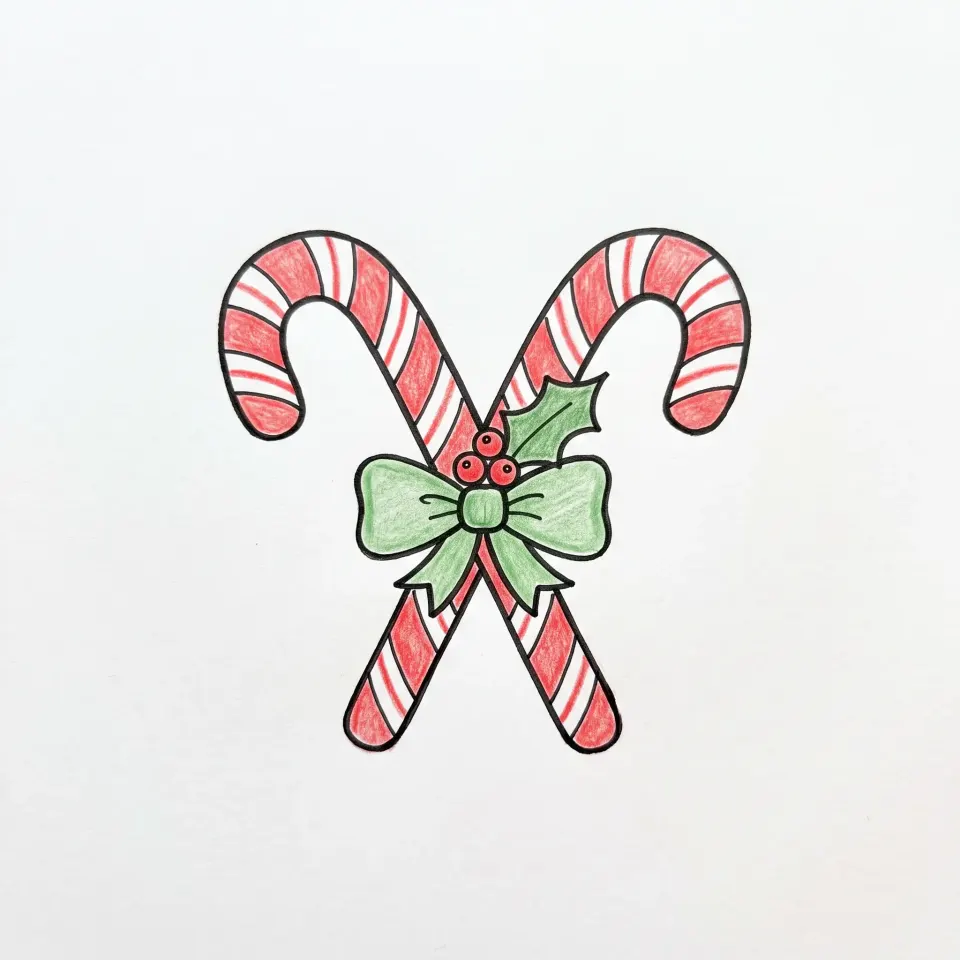
Level: very easy · Time: 5 to 10 minutes
- Draw a thick J: two parallel lines that curve into a hook at the top.
- Draw a second one, crossing the first.
- Draw diagonal stripes, all going the same way.
- Add a bow where they cross, and a holly leaf with three berries.
Coloring tip: color every other stripe red and leave the others white. It looks cleaner if you always color in the direction of the stripes.
14. How to Draw Hot Chocolate
A mug, a mountain of whipped cream and a few swirls of steam: the coziest winter drawing.
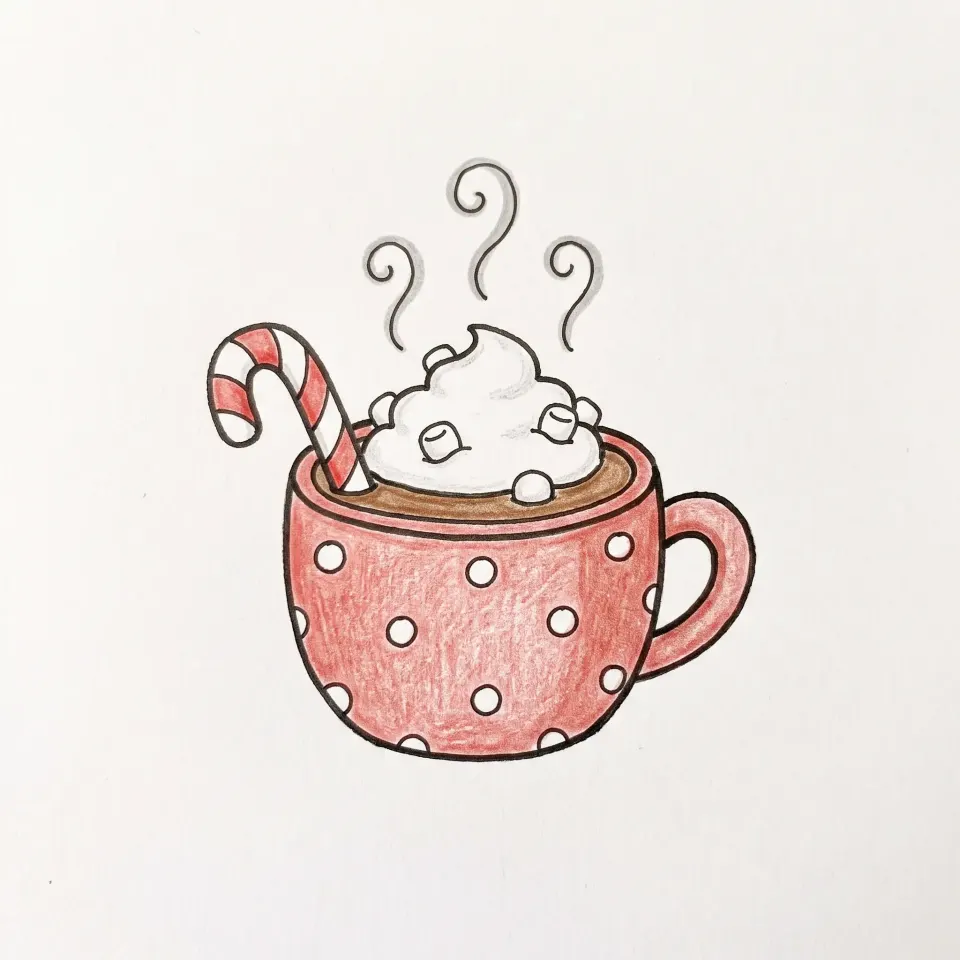
Level: easy · Time: 10 minutes
- Draw a mug: a flattened half circle or a rounded U shape, with a handle on the side.
- Draw the rim as an oval, with the chocolate just below.
- Add cloud-shaped whipped cream spilling over, a few marshmallows as small rounded squares and a candy cane.
- Above it, draw three S-shaped swirls of steam.
Coloring tip: a red mug with white polka dots feels very Christmassy. Use a warm brown for the chocolate; a simple light gray line is enough for the steam.
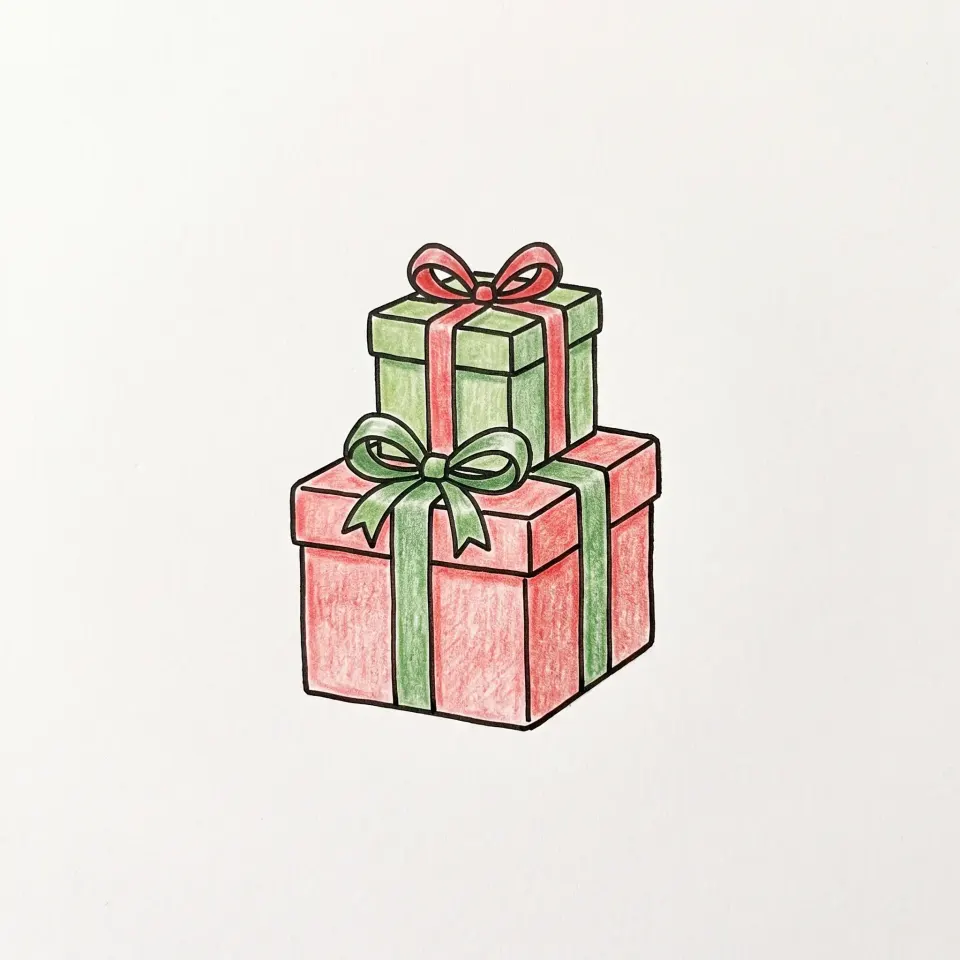
15. How to Draw Christmas Presents
Stacked gifts: two cubes, ribbons and bows. The only small challenge is drawing the boxes in 3D.
Level: easy · Time: 15 minutes
- Draw a square for the front of the big box.
- For the 3D effect, add a parallelogram on top (the lid seen from above) and a slanted side on the right.
- Do the same for a small box sitting on top.
- Draw the ribbons crossing each box, then a two-loop bow.
Coloring tip: swap the colors between the two gifts (red with a green ribbon, green with a red ribbon). Color the right side of each box a little darker, and the 3D effect appears on its own.
Coloring your Christmas drawings
The Christmas palette
A few colors are enough for all your drawings to match:
- bright red: hats, ornaments, ribbons, candy canes;
- pine green, light and dark: trees, holly, elves;
- golden yellow or ochre: stars, bells, decorations;
- light brown: gingerbread, reindeer, trunks;
- icy blue: snow, snowflakes, shadows on white.
Tips that make a difference
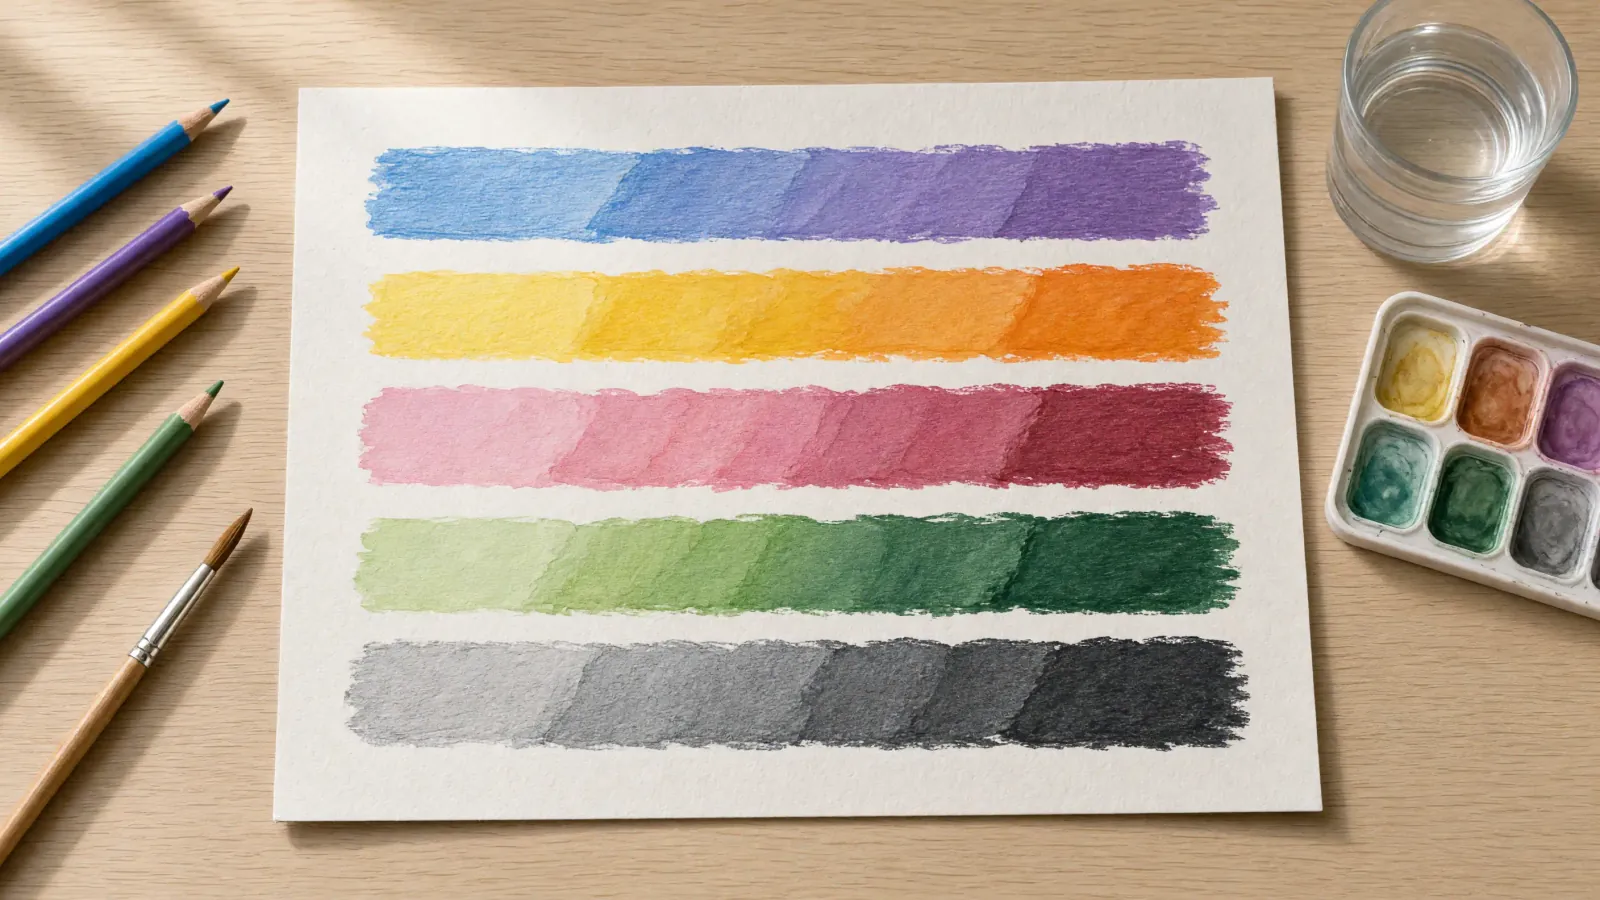
- White is not colored. Leave the paper and shade the edge with a very light blue or light gray.
- Gold takes two colors. Yellow first, then a little ochre or orange on one side, and a small white highlight.
- Two shades per color. A light green everywhere and a dark green in the shadows: the drawing gets depth with no effort.
- Highlights. Leave a small white spot on ornaments, eyes and boots. It makes them look shiny and alive.
To blend smoothly from one shade to another (a winter sky, a shiny ornament), our guide to making a color gradient explains the method, and the gradient generator gives you the in-between shades.
What to do with your Christmas drawings
A good Christmas drawing deserves better than a drawer. Five simple ideas:
- A Christmas card. Fold a sheet of letter paper in half (or in quarters), draw one well-centered design on the front (a tree, a hat, an ornament) and write your message inside. For the message, handwritten or calligraphy-style lettering makes an instant difference: Creative Fabrica offers thousands of Christmas fonts, to download and print your text, or simply to copy by hand.
- Gift tags. Small Christmas doodles (candy cane, ornament, Santa hat) on rectangles of cardstock, with a hole punched for the ribbon.
- Ornaments to hang. Draw on thick paper, cut out leaving a small white border, punch a hole and hang them on the tree.
- Window drawings. With chalk markers, which wipe off with a damp cloth, snowflakes, snowmen and trees make beautiful Christmas windows. Test in a corner first.
- Handmade wrapping paper. On a large sheet of kraft paper, repeat a small Christmas doodle (candy cane, star, snowflake) across the whole surface.
Which Christmas drawings are best for kids?
Depending on age, some models work better than others:
- Ages 3-4: the ornament, the candy cane, the Santa hat and the gift. An adult draws the first shape, and the child adds the patterns and colors.
- Ages 5-7: the Christmas tree, the snowman, the penguin and the gingerbread man, built from two or three shapes.
- Ages 8 and up: Santa, the reindeer, the elf, the polar bear and the hot chocolate.
- For the most patient: the snowflake and the wreath, which need a steady hand.
The step-by-step tutorials for the tree, the snowman and Santa are the best for a group activity, in class or with family: everyone moves forward at the same pace, panel by panel.
Remember
You do not need to copy the model exactly. A leaning snowman, a slightly crooked tree or a reindeer with uneven antlers often has more charm than a perfect drawing.
Rather color than draw?
For more detailed designs made for grown-ups, our Christmas coloring pages for adults offer 24 printables: cozy fireside scenes, snowy villages, trees, reindeer and mandalas, from easy to challenging.
If you prefer a ready-made drawing, our kawaii coloring pages include a Christmas category: Santa in his sleigh, a reindeer in a beanie, a Christmas tree with smiling ornaments, a snowman and friends, hot chocolate and more. They download for free as PDFs, ready to print. You can also color right on your screen with our free online coloring pages.
For more detailed winter animals, our realistic animal coloring pages include a polar bear on the ice floe and an emperor penguin family, also free as PDFs.
FAQ — Easy Christmas Drawings
6What is the easiest thing to draw for Christmas?
How do you draw a simple Christmas tree?
What supplies do I need for Christmas drawings?
How do you color white on a snowman?
What can I make with my Christmas drawings?
What Christmas drawing can a 4-year-old do?
Key takeaways
Making easy Christmas drawings comes down to three ideas:
- See the simple shapes in every drawing: circles, triangles, rectangles.
- Sketch lightly in pencil, and only go over it in pen once you like the drawing.
- Color with just a few colors, leaving the white of the paper for snow and highlights.
Start with the Christmas tree or the snowman, then try something a little busier, like the reindeer or the wreath. To keep drawing all year round, here are 150 drawing ideas, with a random idea generator. More techniques are waiting for you in the Kolorii Journal.
Rather color than draw? Our kawaii Christmas coloring pages are free PDFs
See kawaii Christmas coloring pages