What you'll learn
- What a color gradient is, and the four main types
- The 3 rules that keep a gradient smooth with any medium
- How to blend colored pencils: layering, burnishing and blending tools
- Step-by-step methods for graphite, markers, watercolor, acrylic and digital
- 8 gradient color palettes by color, with their HEX codes
- A free color gradient generator and a printable practice worksheet
Contents
9A color gradient is a gradual transition from one color to another, with no visible edge in between. On paper, though, it often ends up looking like something else: hard stripes, streaky marker lines, or a muddy brown patch right where you expected a glowing orange.
The good news is that smooth gradients come down to three simple rules, and they are the same for every medium. This guide walks you through them, then shows how to apply them with colored pencils (with a full section on blending), graphite, markers, watercolor, acrylic and digital tools. You will also find 8 ready-to-use gradient palettes, a free color gradient generator and a printable practice worksheet.
What Is a Color Gradient?
A color gradient is a continuous change of color: from one color to another, or from a light to a dark shade of the same color. Your eye should not be able to tell where the first color stops and the second one starts.
There are four main types:
- two-color gradients, between two colors (yellow to orange, for example);
- multicolor gradients, which run through three colors or more, like a rainbow;
- light-to-dark gradients, with a single color, from sky blue to navy;
- radial gradients, which spread from the center outward, while the others are usually linear (left to right or top to bottom).
- Two-color Two colors, here yellow to orange.
- Multicolor Three colors or more, like a rainbow.
- Light to dark One color, from sky blue to navy.
- Radial From the center outward, like a sun.
Depending on the context, you will also hear blend, fade or ombré. Designers sometimes call it a color ramp. Whatever the name, the goal is the same: a transition so gradual that it looks effortless.
Tonal Steps vs. Gradient
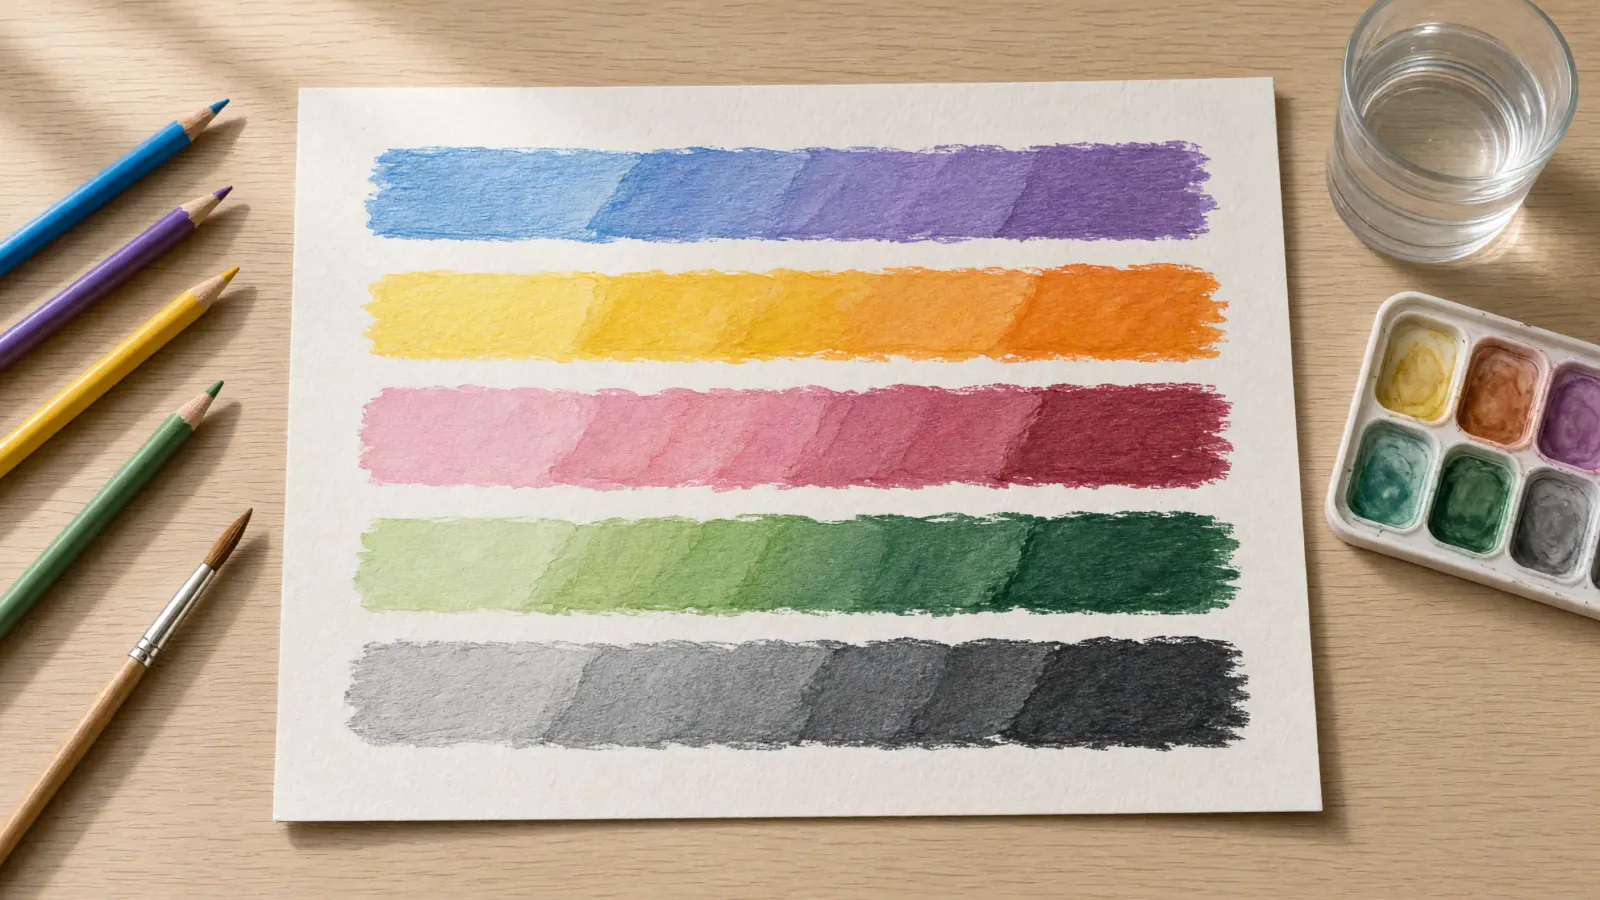
Artists often practice with a value scale first: a row of separate boxes, each a little darker than the last. These tonal steps teach you to control pressure. A gradient is the next step: the same shades, blended into one continuous transition.
Tonal steps: separate shades of one color, side by side (a value scale)
Gradient: one continuous transition, with no visible edge
The 3 Rules of a Smooth Gradient
Whatever you use, a smooth color gradient follows three rules: neighboring colors, light to dark, and gradually increasing pressure.
1. Pick Neighboring Colors on the Color Wheel
The color wheel arranges colors in rainbow order. Neighboring colors (yellow and orange, blue and purple, green and blue) blend naturally: their mix stays bright. Opposite colors (red and green, blue and orange, yellow and purple) cancel each other out, and the middle of the gradient turns muddy brown or gray.
The color wheel
Neighbors: from yellow to red through orange, the gradient stays bright
Opposites: from red to green, the middle turns muddy brown
2. Work From Light to Dark
As a rule, start with the lightest color across the whole area of the gradient: darkening a color is easy; lightening it is much harder. Watercolor is the exception: you start with the strongest color and lighten it with water. Then keep a wide transition area where both colors overlap: the narrower it is, the more visible the edge.
3. Build Up the Pressure
A smooth gradient depends less on how many colors you use than on how you lay them down. With pencils, start with barely any pressure and press harder toward the dark end. With watercolor, the amount of water plays that role; with acrylic, the amount of pigment.
Tip
Two colors won’t blend? Add an in-between color. From yellow to red, go through orange; from blue to pink, go through purple. The transition instantly gets softer. This is exactly what a three-color gradient is for.
How to Blend Colored Pencils (Step by Step)
Blending colored pencils means layering two or more colors so they merge into a smooth transition, without visible strokes. It relies on three techniques you can combine: layering, burnishing and blending tools.
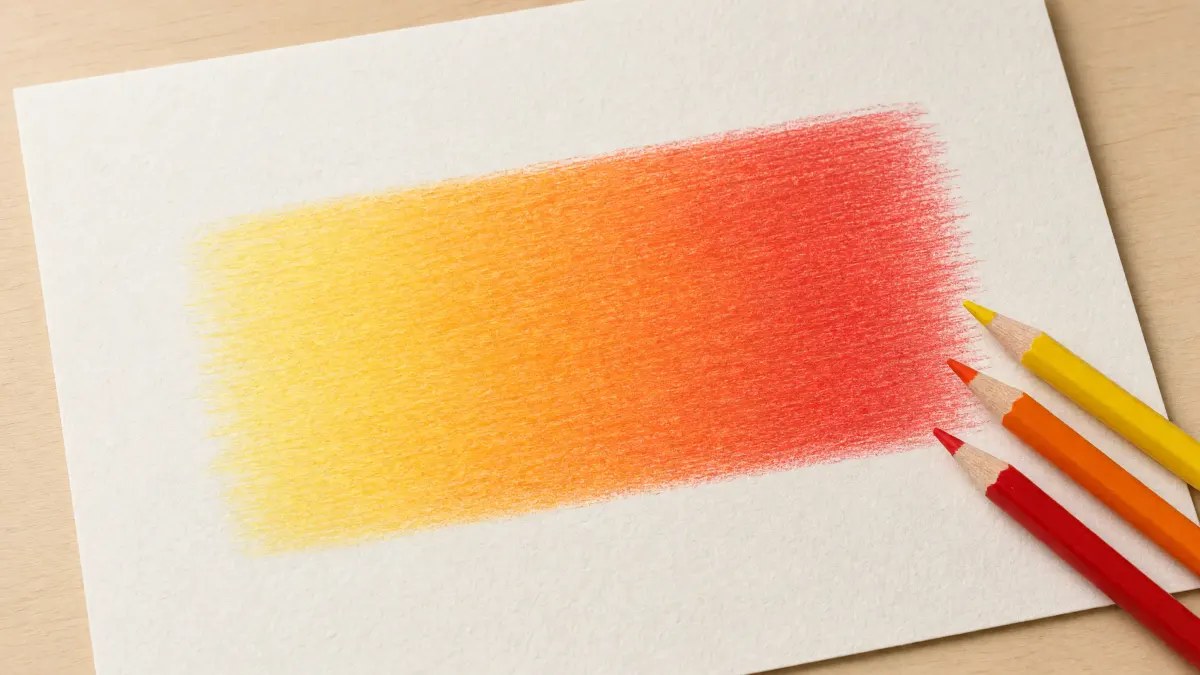
Here is the basic method for a two-color gradient:
- Lay the light color over the whole area with very light pressure.
- Start the dark color from the opposite end, easing off the pressure as you move toward the middle.
- In the transition area, overlap both colors with small circular strokes.
- Go back over the transition with the light color to soften the edge.
- Repeat steps 2 to 4 with slightly more pressure until the gradient looks even.
Layering
Layering is the foundation of colored pencil blending. Instead of one heavy coat, you apply several thin, light layers. Each layer fills a little more of the paper’s grain (its tooth), and the colors mix optically on the page.
- Keep your pencils sharp: a fine point reaches into the paper’s grain.
- Use small circles or tight back-and-forth strokes rather than long lines, which leave visible marks.
- Change the direction of your strokes from one layer to the next.
- Stop before the paper looks shiny: that means its tooth is full and new layers will not stick.
Burnishing
Burnishing is the finishing step: you go over the area with heavy pressure, usually with a white pencil or a colorless blender pencil. It pushes the pigment into the remaining grain, smooths out the last strokes and gives a soft, polished look.
- Finish all your layers first: after burnishing, adding more color becomes difficult.
- Burnish from the light end toward the dark end, so you don’t drag dark pigment into the light area.
- Use firm but even pressure, with small circles.
A white pencil also lightens the colors slightly; a colorless blender keeps them as they are.
Blending Tools: Blender Pencil, Blending Stump and Solvents
You don’t need any special tool to blend colored pencils, but a few can save time:
- Colorless blender pencil: a pencil with no pigment, used to merge layers and burnish without changing the color.
- Blending stump (or tortillon): a tightly rolled paper stick that spreads and softens pigment. It works best on soft leads and on graphite.
- Solvents: some colored pencil artists dissolve the pigment slightly with odorless mineral spirits applied with a brush or cotton swab. If you try it, work in a well-ventilated room, use very little, keep it away from children and follow the product’s safety instructions.
Which Colored Pencils Blend Best?
Pencils that blend easily share a few traits, whatever the brand:
- a soft lead, which releases pigment with little pressure;
- a good amount of pigment, for rich layers;
- a wax-based core (very creamy) or an oil-based core (a little firmer, less wax bloom).
Harder, student-grade pencils can blend too: they simply need more layers and a final burnishing step. Smooth to medium-tooth drawing paper also helps, since very rough paper leaves white specks.
How to Make a Gradient With Other Mediums
The principle stays the same with every medium; only the gestures change.
Graphite (Light to Dark)
A graphite gradient, from white to black, is the classic shading exercise: it is how drawings get volume.
- With one pencil (an HB, for example), draw very light hatching at one end.
- Move along, pressing a little harder with each pass, until you reach your darkest gray.
- To go further, switch pencils: HB for light grays, 2B then 4B for darker values.
- Soften with a blending stump or a tissue to blend away the strokes.
The “Gray gradient, from white to black” palette below shows the six values to aim for.
Markers
Let’s be honest: markers are harder than colored pencils, because ink dries fast and leaves streaks.
- Work in small areas, quickly, while the ink is still wet.
- Lay the light color everywhere, then the dark color at one end.
- Go back over the transition with the light color: it pulls the dark ink and softens the edge.
- If you have one, use a colorless blender marker to merge both colors.
Alcohol markers and brush-tip markers blend much more easily than water-based school markers.
Watercolor (Gradient Wash)
With watercolor, water does the work: the more water, the lighter the color. This technique is called a gradient wash (or graded wash).
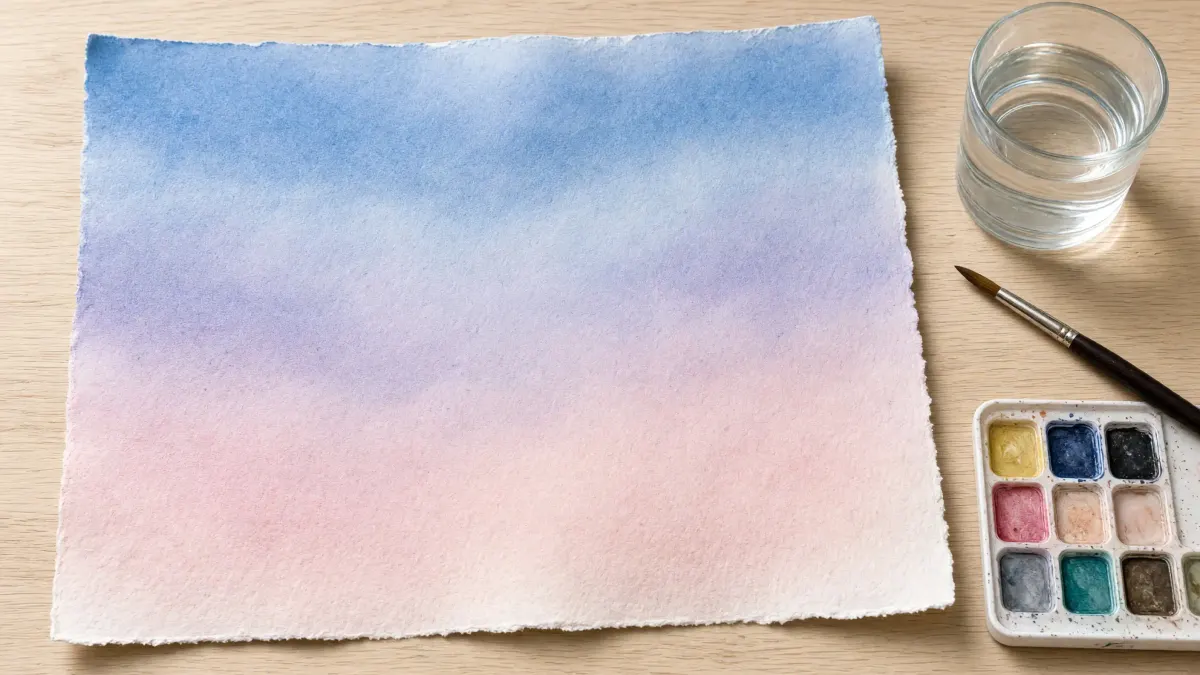
- Use thick watercolor paper (140 lb / 300 gsm is a common choice), so it doesn’t buckle too much.
- Lightly dampen the paper with a clean brush.
- Paint a stroke of color at the top, then add a little water with each horizontal stroke as you move down.
- Tilt the paper slightly so the color flows and blends on its own.
- For two colors, lay one at each end and let them meet while the paper is still wet.
It is the perfect technique for skies and sunsets. Watercolor pencils sit in between: you color with the pencil, then blend with a damp brush.
Acrylic Paint
With acrylic, the gradient is prepared on the palette before it reaches the canvas.
- Mix three values: the light color, the dark color and a blend of both.
- Paint the light color at one end, the dark color at the other, and the in-between value in the middle.
- Blend the edges with a clean, barely damp brush, using back-and-forth strokes.
- Work fast: thin acrylic layers dry within minutes. A retarder medium gives you more time.
Digital (Canva, Procreate, Photoshop)
Digitally, making a color gradient is instant: every design app has a gradient tool that asks for a start color, an end color and a direction.
- Canva: select a background or shape, then pick a gradient in the color menu.
- Procreate and Photoshop: use the gradient tool, or a soft brush at low opacity for a more hand-drawn feel.
The hard part is no longer the gesture, but choosing the in-between shades. That is exactly what the generator below does. And if you’d like to color on screen, try our free online coloring pages.
Try the Gradient Generator
Pick two or three colors (up to six) and the number of shades: the generator works out evenly spaced in-between tones. Copy their HEX codes, download the image or print a practice sheet to recreate the gradient with your pencils. Everything runs in your browser; nothing is sent anywhere. For more (radial gradients, phone and desktop wallpapers, ready-made gradients by color), open the full gradient generator.
Create my gradient
Pick your colors and the number of shades: the tool works out the in-between tones. Copy their codes or print a practice sheet.
Your shades
Tap a shade to copy its code.
Everything runs on your device: nothing is sent.
Ready-made palettes
Gradient Color Palettes by Color
Each palette lists its shades in order, with their HEX codes. Use “Open in the generator” to load it into the tool above, adjust it or print it.
-
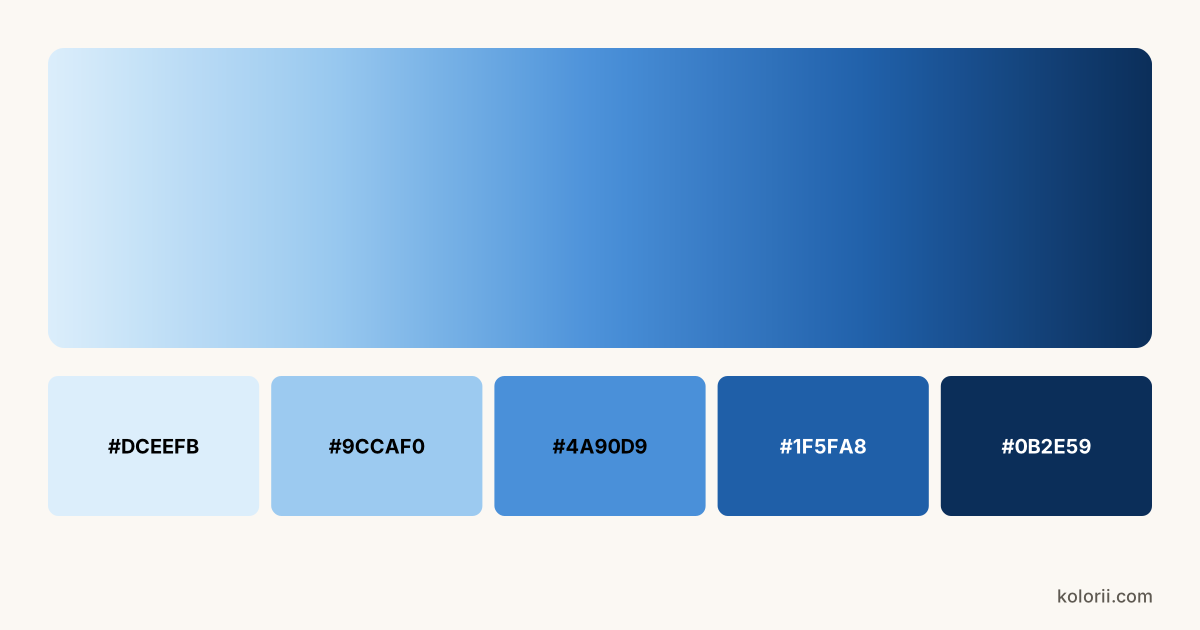
Blue color gradient
From pale sky to deep navy, for skies and seascapes: lightest near the horizon, darkest at the top.
-
#DCEEFB -
#9CCAF0 -
#4A90D9 -
#1F5FA8 -
#0B2E59
-
-
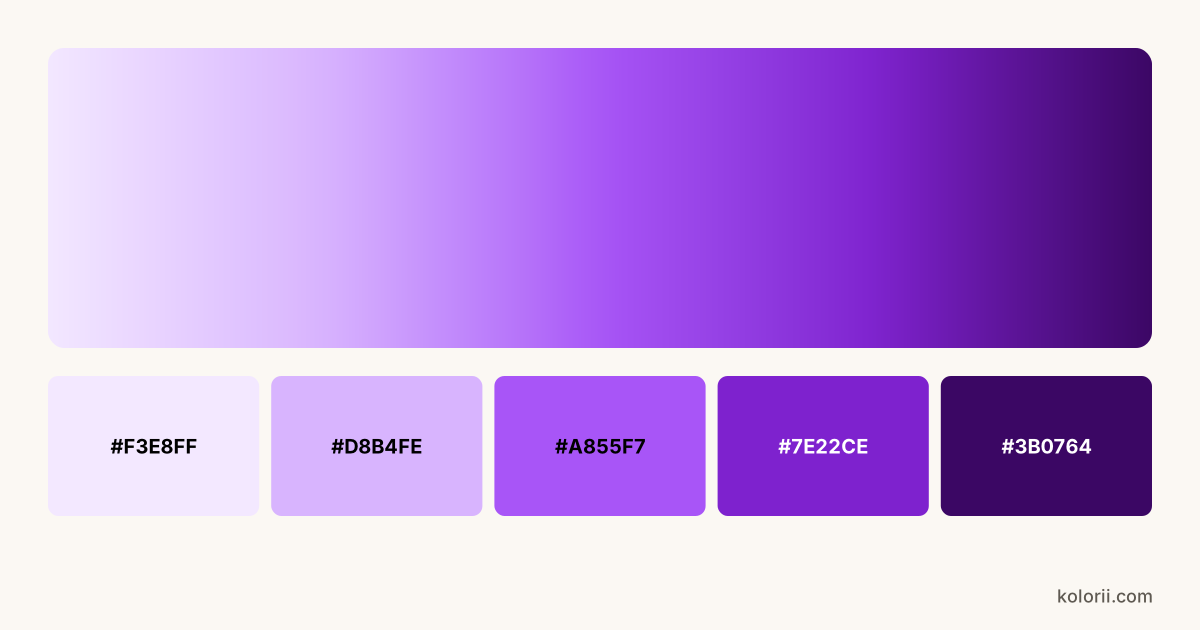
Purple color gradient
From soft lavender to deep violet, for flowers, galaxies and night skies.
-
#F3E8FF -
#D8B4FE -
#A855F7 -
#7E22CE -
#3B0764
-
-
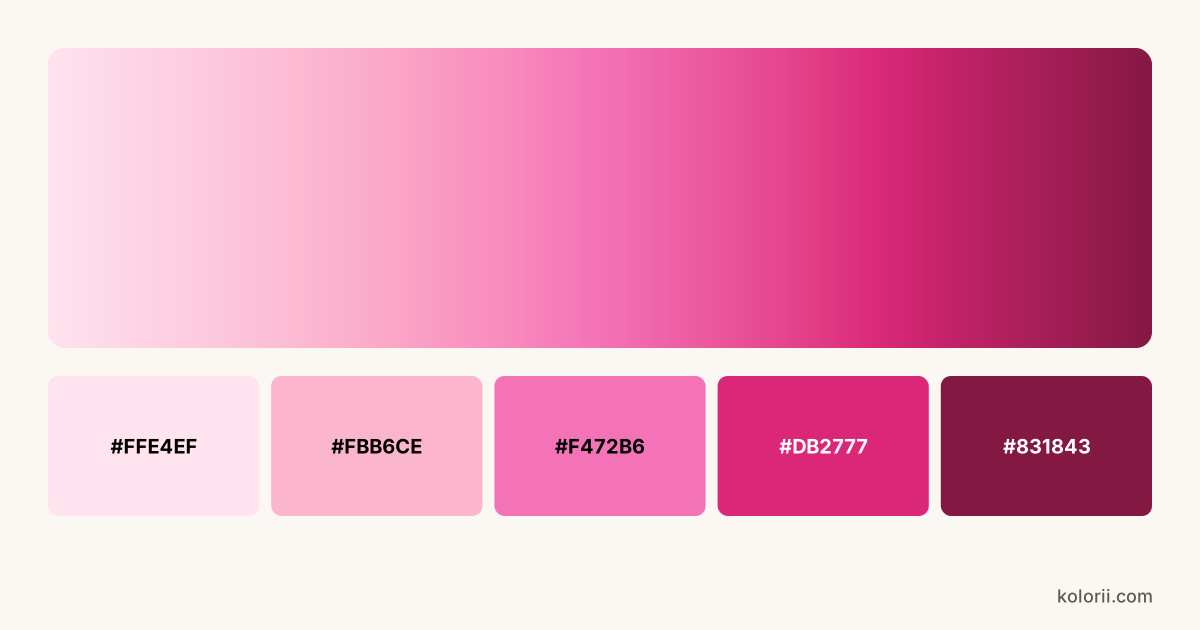
Pink color gradient
From blush to deep magenta, for petals, hearts and cute characters.
-
#FFE4EF -
#FBB6CE -
#F472B6 -
#DB2777 -
#831843
-
-
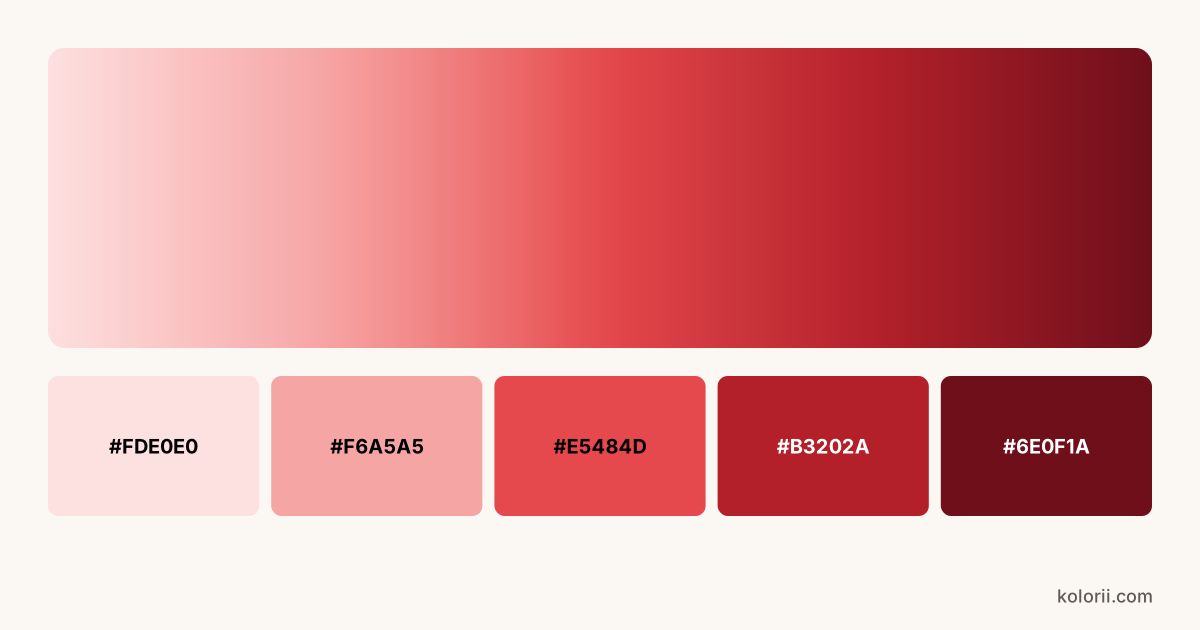
Red color gradient
From pale pink to burgundy, for petals and hearts: light on the edges, dark at the center.
-
#FDE0E0 -
#F6A5A5 -
#E5484D -
#B3202A -
#6E0F1A
-
-
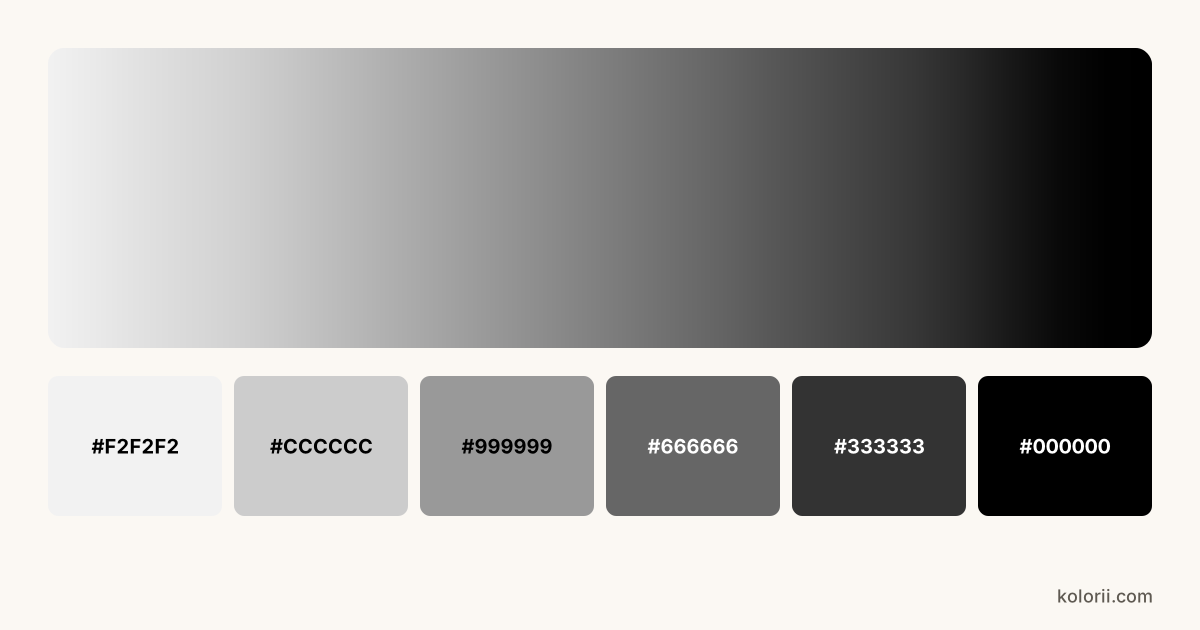
Gray gradient, from white to black
For shading and volume, in graphite or in color: each shade means a little more pressure.
-
#F2F2F2 -
#CCCCCC -
#999999 -
#666666 -
#333333 -
#000000
-
-
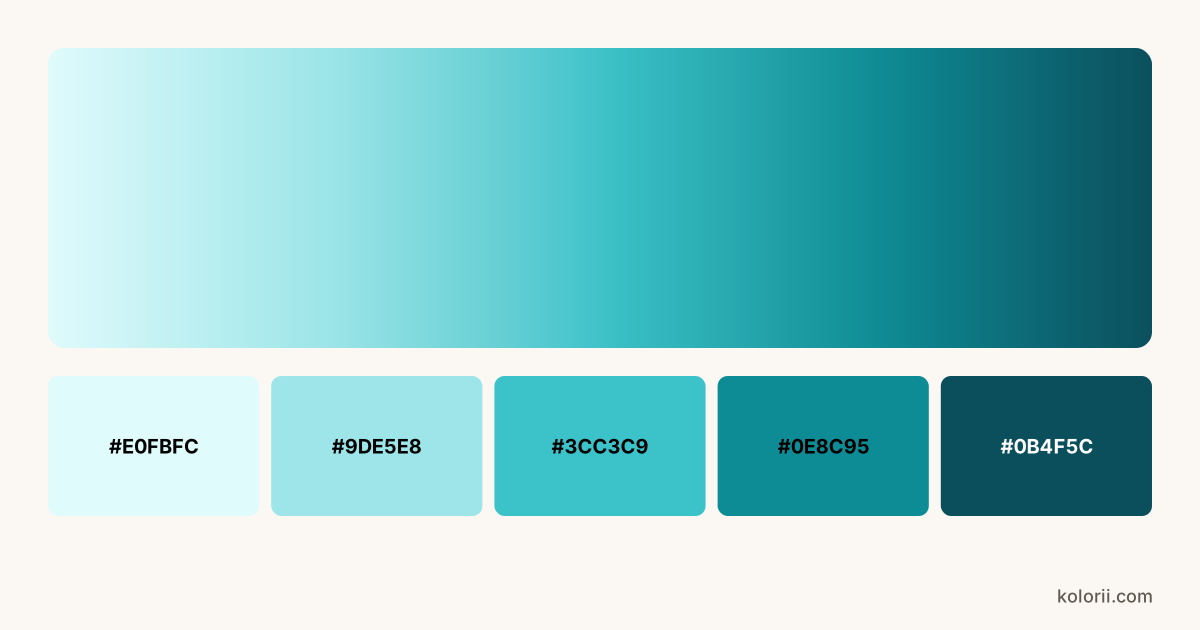
Teal and cyan gradient
From icy aqua to deep teal, for water, tropical seas and fresh, modern designs.
-
#E0FBFC -
#9DE5E8 -
#3CC3C9 -
#0E8C95 -
#0B4F5C
-
-
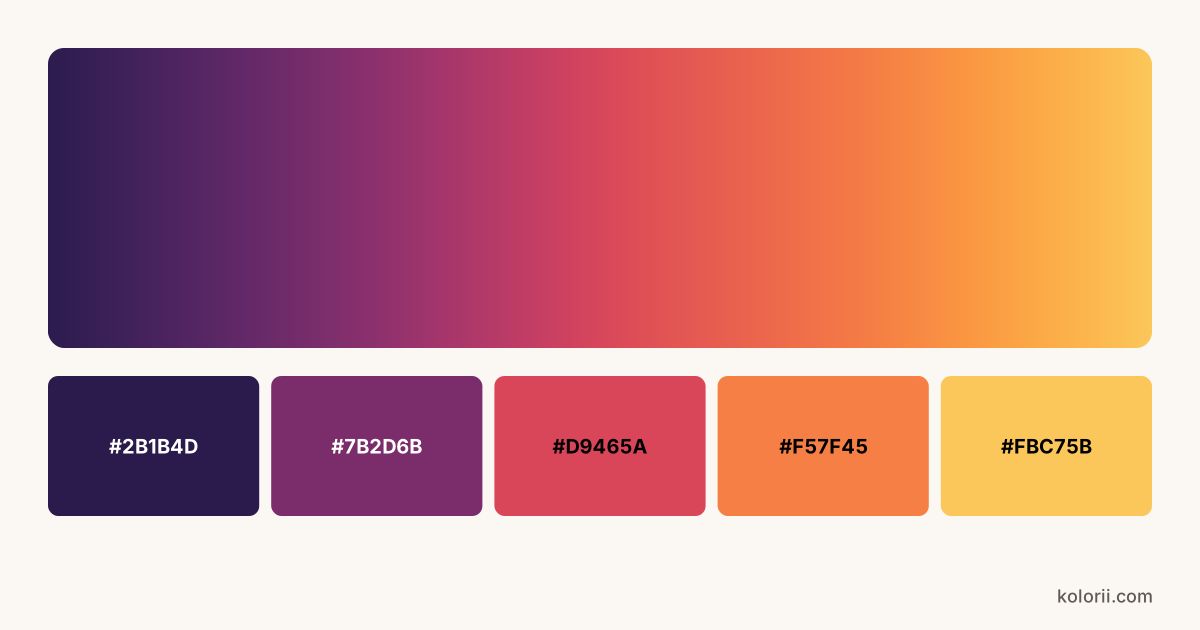
Sunset gradient
From night purple to golden yellow: the palette for evening skies and landscapes.
-
#2B1B4D -
#7B2D6B -
#D9465A -
#F57F45 -
#FBC75B
-
-
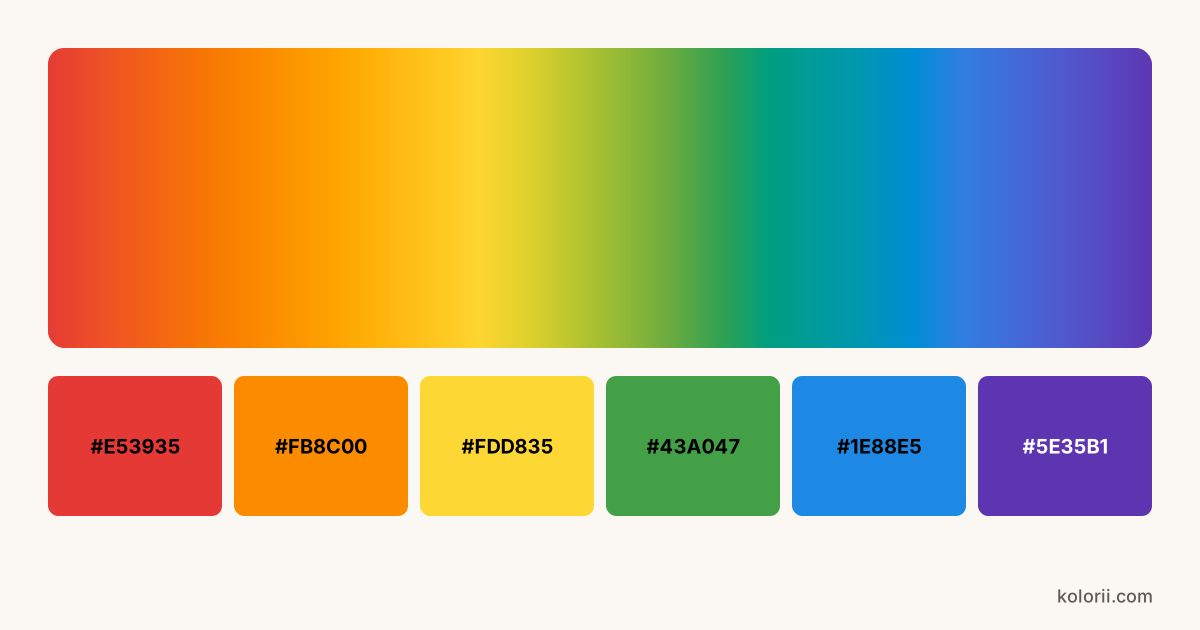
Rainbow gradient
Six neighboring colors in color-wheel order: red, orange, yellow, green, blue, purple.
-
#E53935 -
#FB8C00 -
#FDD835 -
#43A047 -
#1E88E5 -
#5E35B1
-
Looking for another color? Browse our brown, green, cyan and grey gradient pages, with wallpapers ready to download, or enter a light and a dark version of any color in the generator: it will fill in the shades between them.
5 Mistakes That Ruin a Gradient
A gradient that doesn’t work almost always comes down to one of these five causes, and each one has a fix.
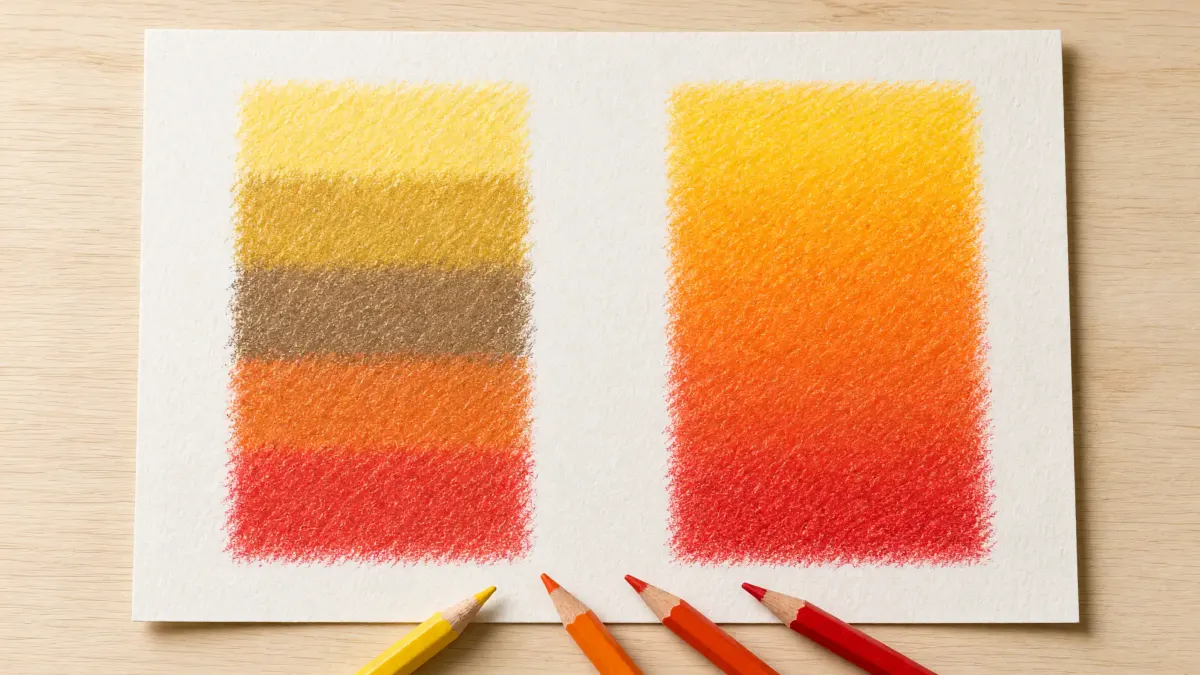
- Visible stripes. The transition area is too narrow. Widen it, overlap more, or add an in-between color.
- A muddy middle. The two colors are opposites on the color wheel. Pick neighbors, or go through a third color.
- Too much pressure too soon. A heavy layer can’t be undone. Start light: you can always go darker later.
- Marker streaks. The ink dried before you blended it. Work in small areas and go over the edge with the lighter color.
- Watercolor blooms. Water was added to an area that was already drying. Work wet-in-wet, or let everything dry completely before going back in.
Practice: Your First Gradient in 15 Minutes
The fastest way to improve is to practice on simple strips before moving on to a drawing. Grab three neighboring colored pencils and a sheet of paper:
- a two-color strip (yellow, then orange);
- a light-to-dark strip with a single pencil, pressing a little harder every inch;
- a three-color strip with neighboring colors (yellow, orange, red).
The practice worksheet includes these strips, a sunset sky to color, test strips, the 3 rules and a color wheel for reference.
Download the practice worksheet
4 step-by-step exercises, test strips and the 3 rules at a glance. Black and white to save ink.
Once you feel comfortable, try the method on a real drawing: a sky in our landscape coloring pages, the petals of a flower coloring page, the large areas of a mandala or a kawaii character with the pink palette. All our free coloring pages print in one click.
FAQ — Color Gradients
6What is a color gradient?
How do you blend colored pencils without a blender?
What colors make a good gradient?
What is the difference between a two-color and a three-color gradient?
Can you blend cheap colored pencils?
What is the easiest medium to make a gradient with?
Key Takeaways
A smooth color gradient doesn’t take talent or expensive supplies. It takes a method:
- neighboring colors on the color wheel (or an in-between color for colors that are far apart);
- working from light to dark, with a wide transition area;
- gradually increasing pressure, or water and paint measured the same way.
To work with color on screen, color online or create with AI, our digital art tools are gathered on one page.
For the technical side of gradients in color science and design, Wikipedia’s Color gradient article is a good starting point. And if coloring helps you unwind, our article on the science of adult coloring and stress explains why.
Ready to practice? Our landscape skies are perfect for gradients
Browse landscape coloring pages